Vue服务端渲染
一、创建文件夹
npm init -y
生成package.json文件
npm install vue vue-renderer --save
、、、、、、、、、、、、、、、、、、、、、、、、、、、、、、、、、、、、、、、、、、、、、
二、动态路由权限
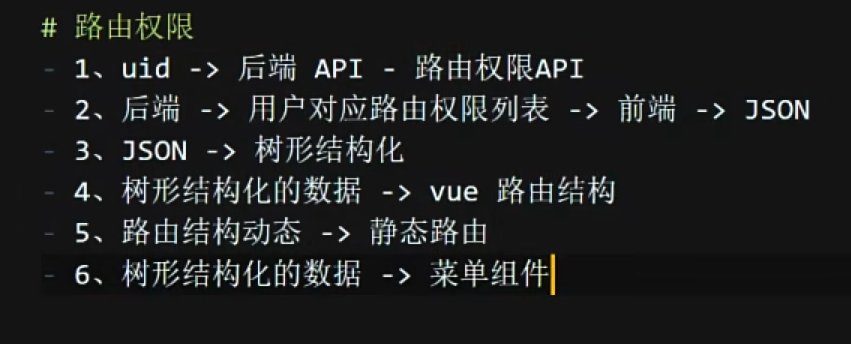
三、递归拼接树形结构
要求实现如下图:
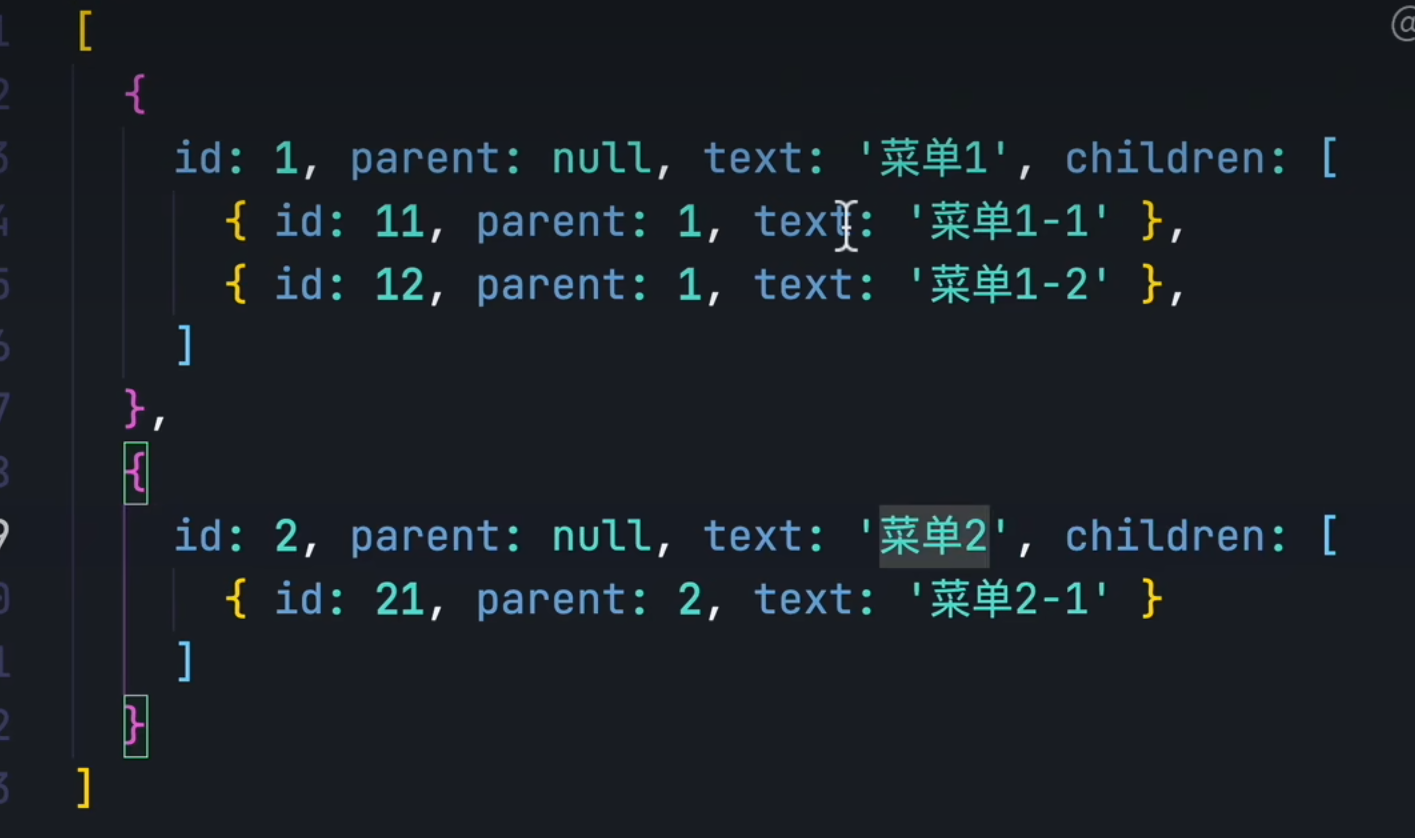
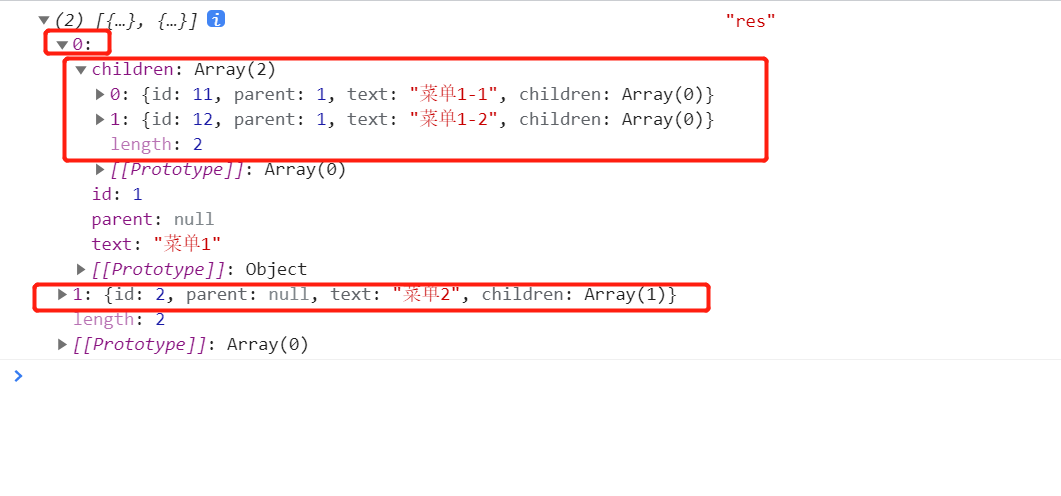
变为下图这种树形结构
1.筛选一级菜单
<!DOCTYPE html>
<html lang="en">
<head>
<meta charset="UTF-8">
<meta http-equiv="X-UA-Compatible" content="IE=edge">
<meta name="viewport" content="width=device-width, initial-scale=1.0">
<title>递归拼接树形结构</title>
</head>
<body>
<script>
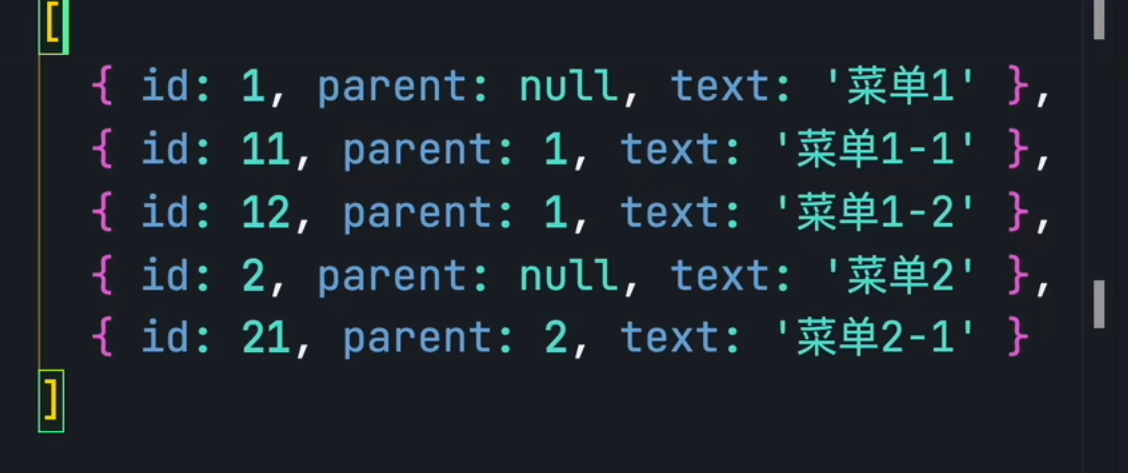
const rootList = [
{ id: 1, parent: null, text: '菜单1' },
{ id: 11, parent: 1, text: '菜单1-1' },
{ id: 12, parent: 1, text: '菜单1-2' },
{ id: 2, parent: null, text: '菜单2' },
{ id: 21, parent: 2, text: '菜单2-1' },
]
function getTreeList(rootList,id,list){
//遍历
for (let item of rootList){
//传入的 id 和 parent 对比,相同就加入list
if(item.parent == id){
list.push(item)
}
}
console.log(list,'list')
}
const res = getTreeList(rootList,null,[])
console.log(res,'res')
</script>
</body>
</html>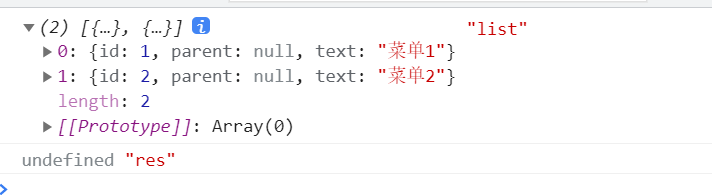
2.加入子菜单
function getTreeList(rootList,id,list){
    //遍历
    for (let item of rootList){
    if(item.parent == id){
    list.push(item)
    }
}


for(let i of list){
    i.children =[]
    getTreeList(rootList,i.id,i.children)
    if(i.children.length == 0){
    delete i.children
    }
}

return list

}
四、解析移动端 rem 布局【CSS小知识】
<!DOCTYPE html>
<html lang="en">
<head>
<meta charset="UTF-8">
<meta http-equiv="X-UA-Compatible" content="IE=edge">
<meta name="viewport" content="width=device-width, initial-scale=1.0">
<title>Document</title>
<style>
/* 因为 1rem = html中的font-size 大小,
所以只需要动态计算不同设备下的html的font-size大小 */
html{
font-size: 16px;
}
body{
font-size: 1rem;
}
</style>
</head>
<body>
<div>一段文字</div>
</body>
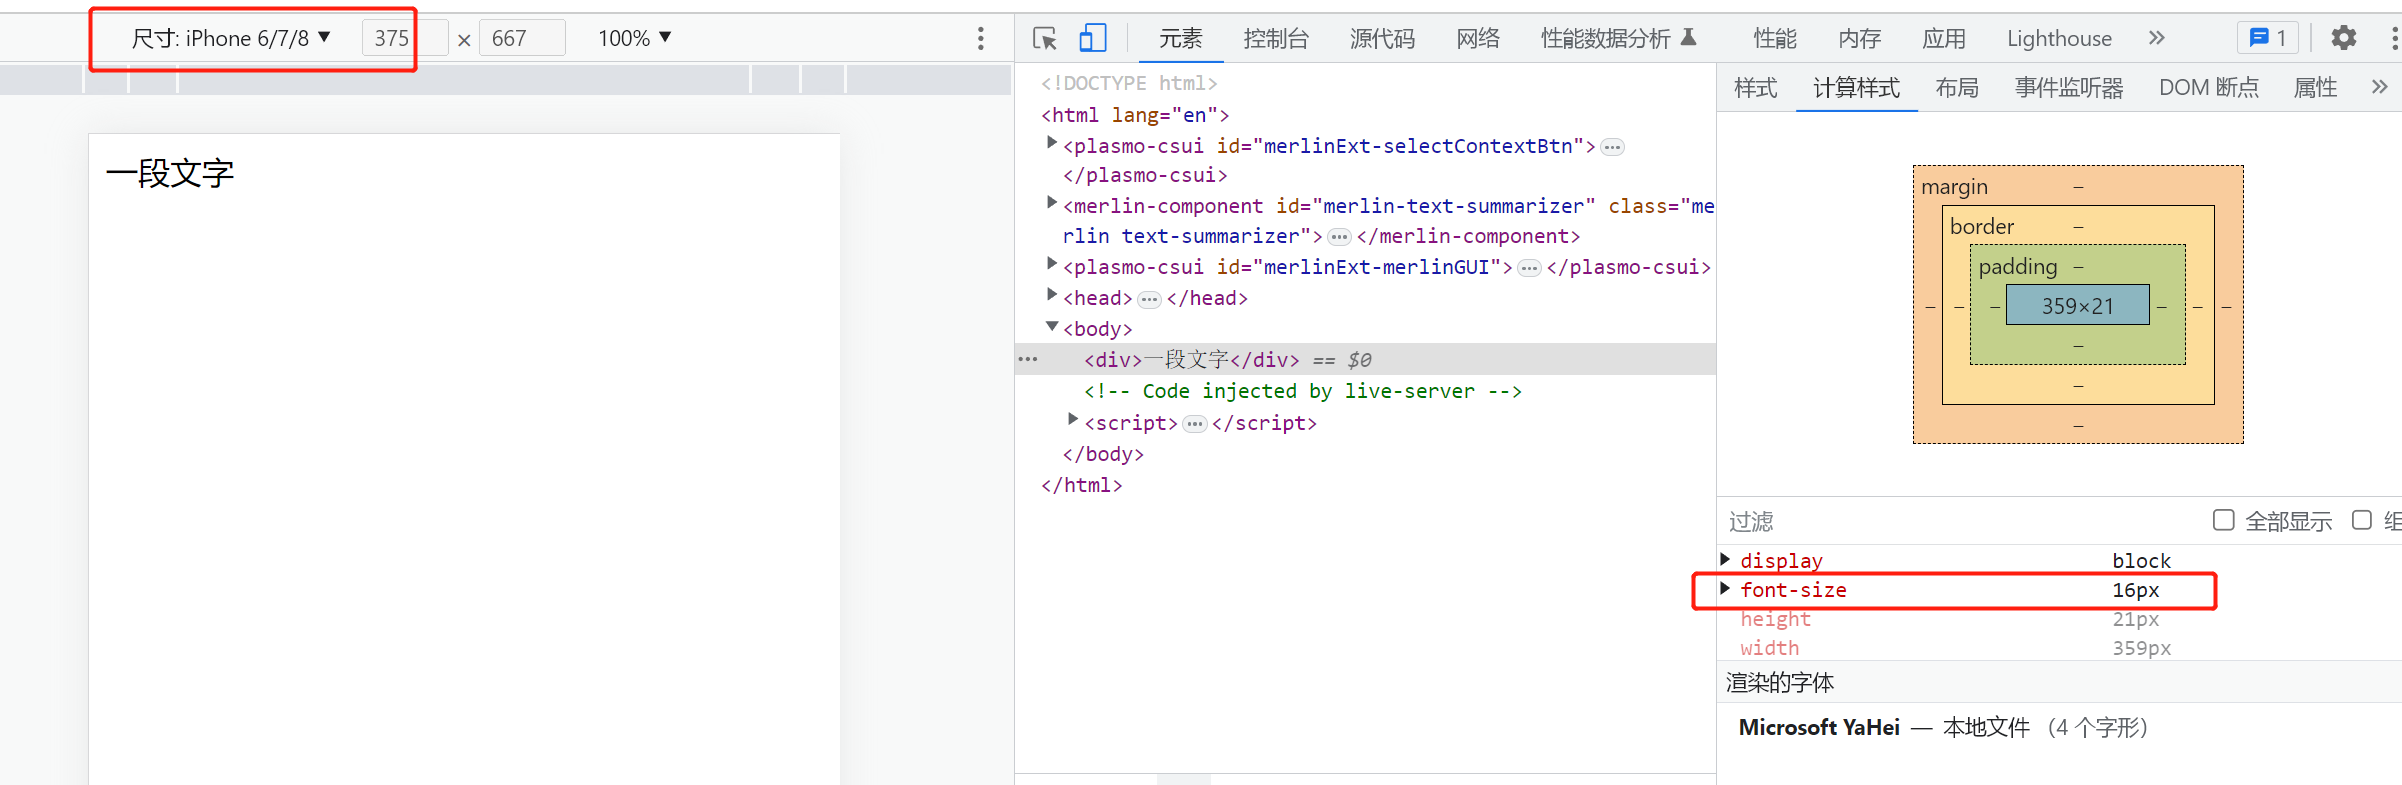
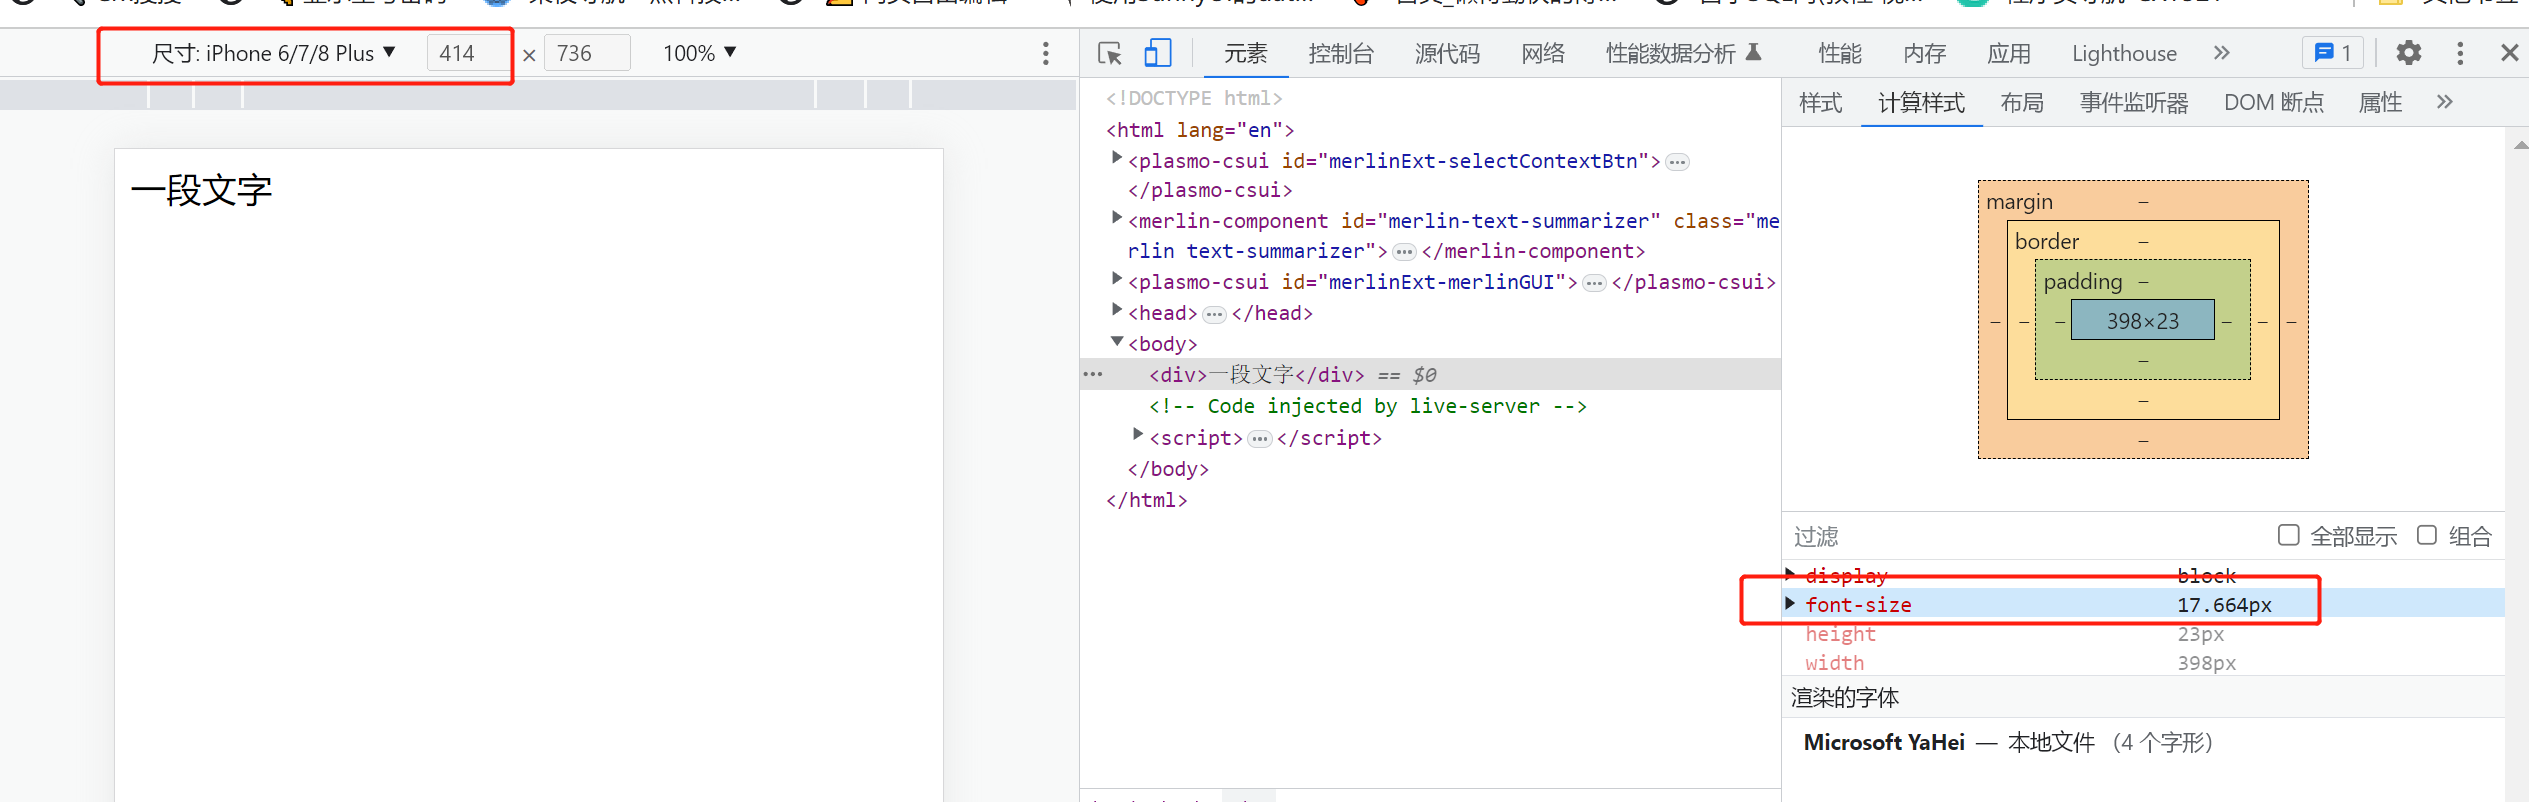
</html>假设,设计稿是375px

100vw == 375px :100的视口宽度,等于375px
那么100px =100/3.75 =26.6666667 vw
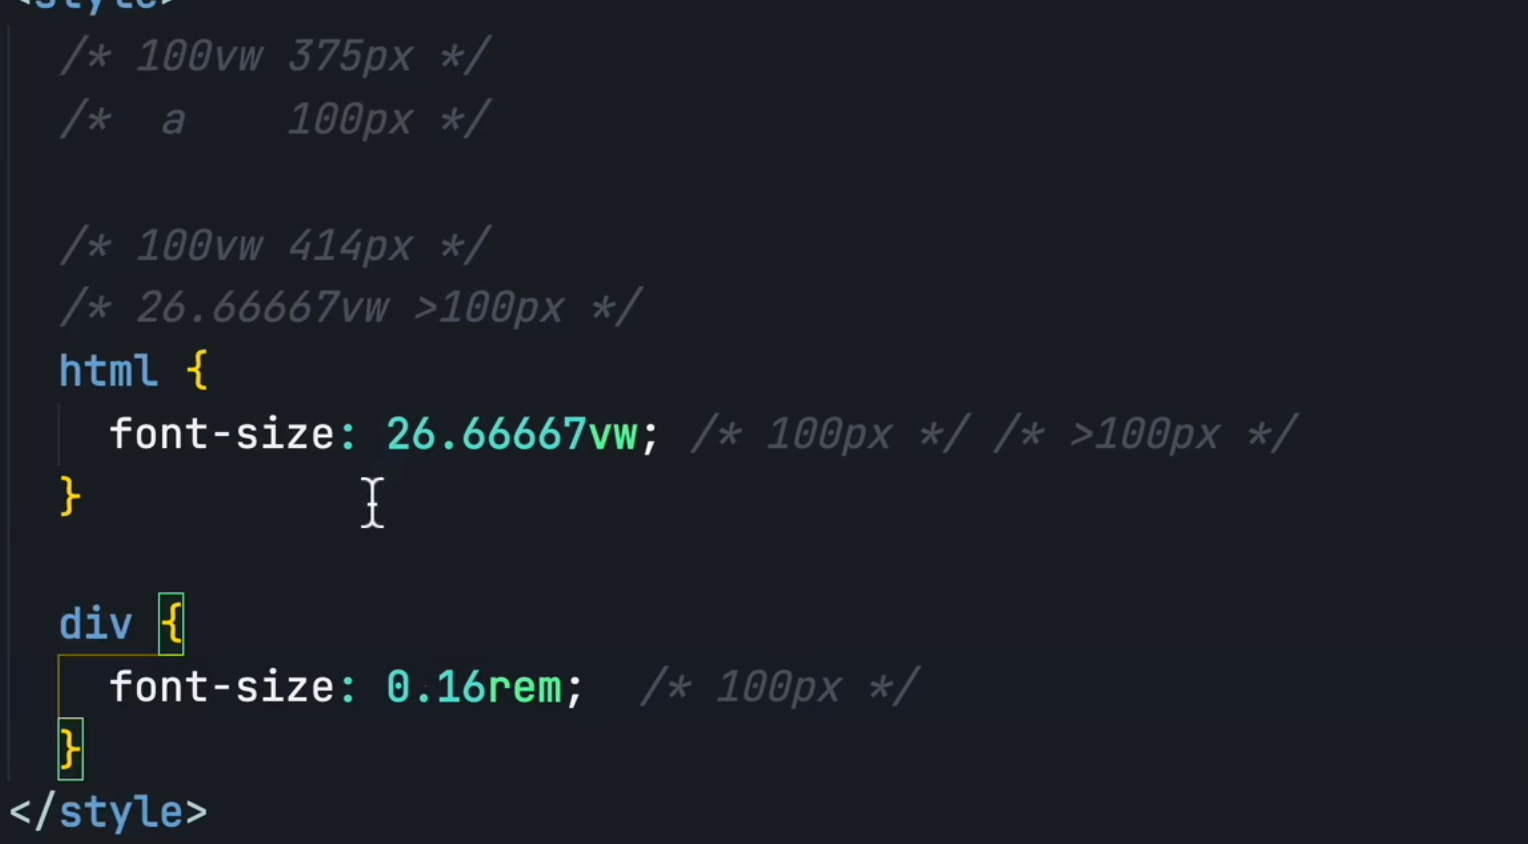
当 屏幕切换为414px时,则会大于 26.666667vw, 那么div中的font-size就会相应的变大
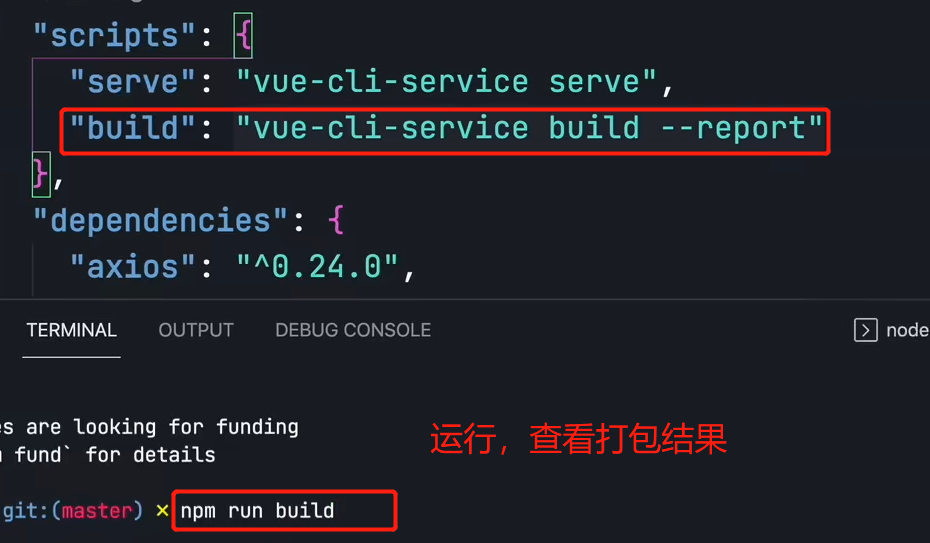
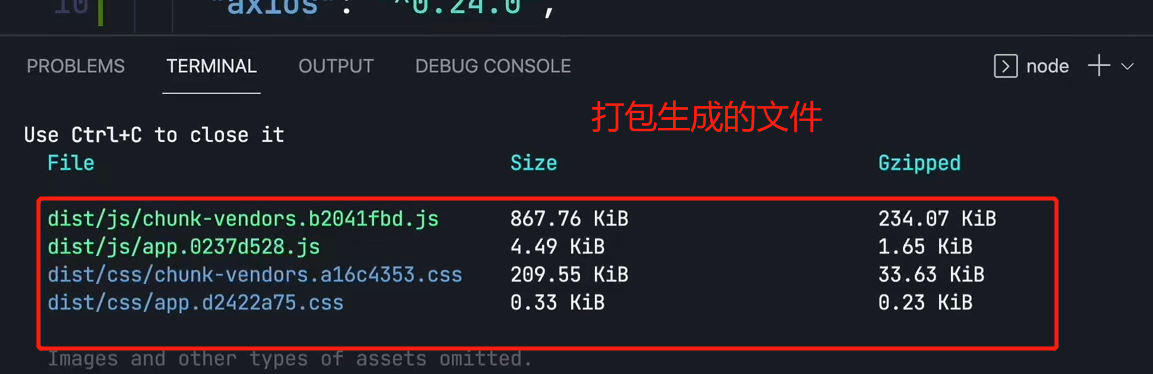
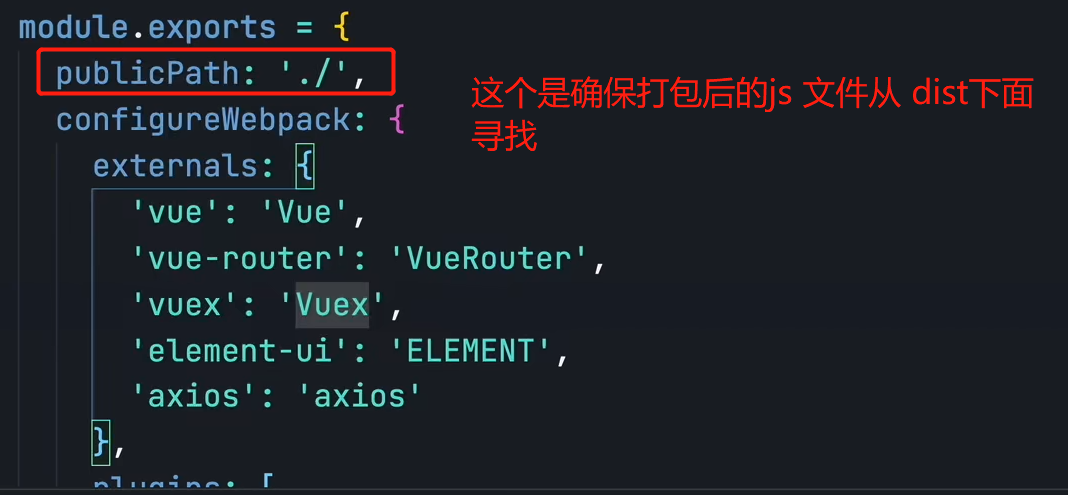
五、Vue打包优化 - 加快首屏加载速度【Vue小技巧】
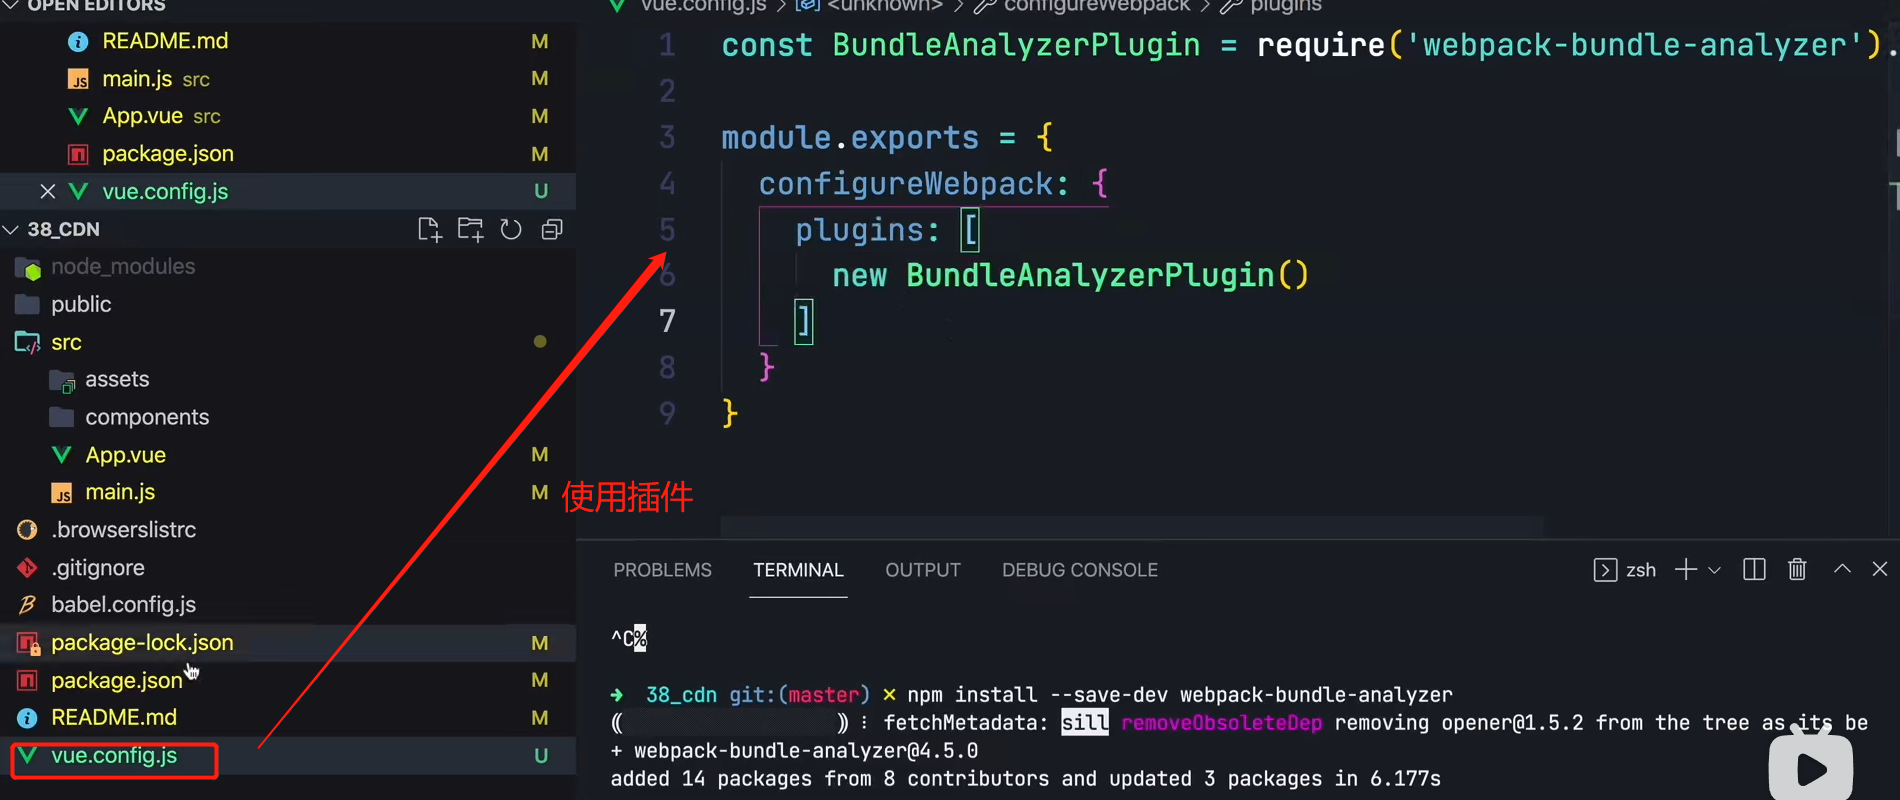
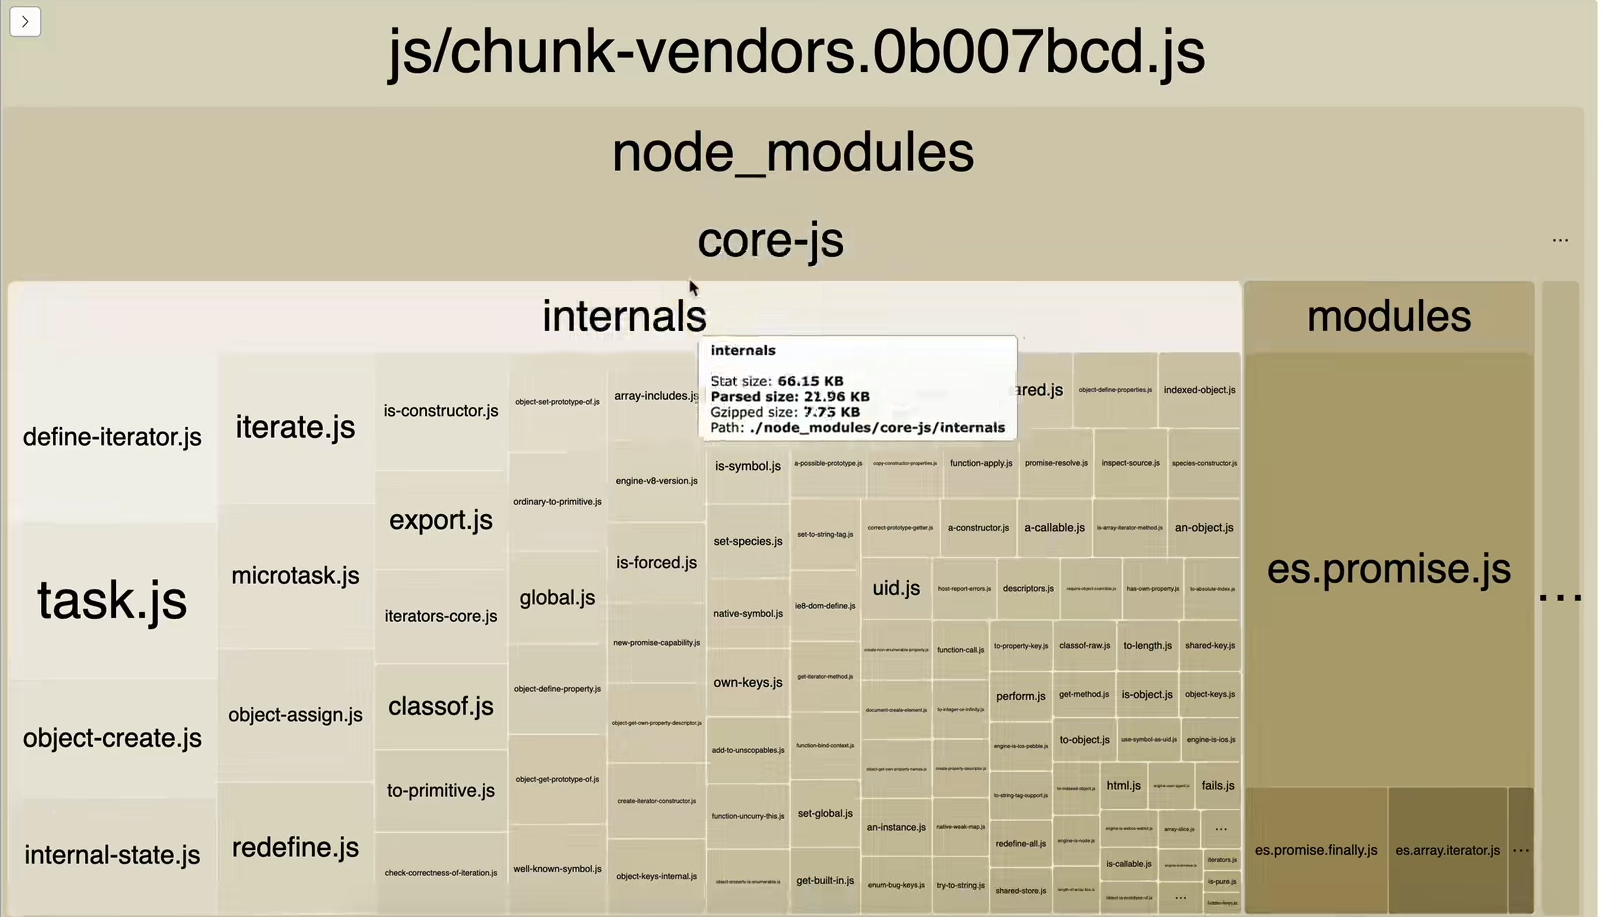
https://github.com/webpack-contrib/webpack-bundle-analyzer

这个插件用来分析,webpack 打包后的结果的
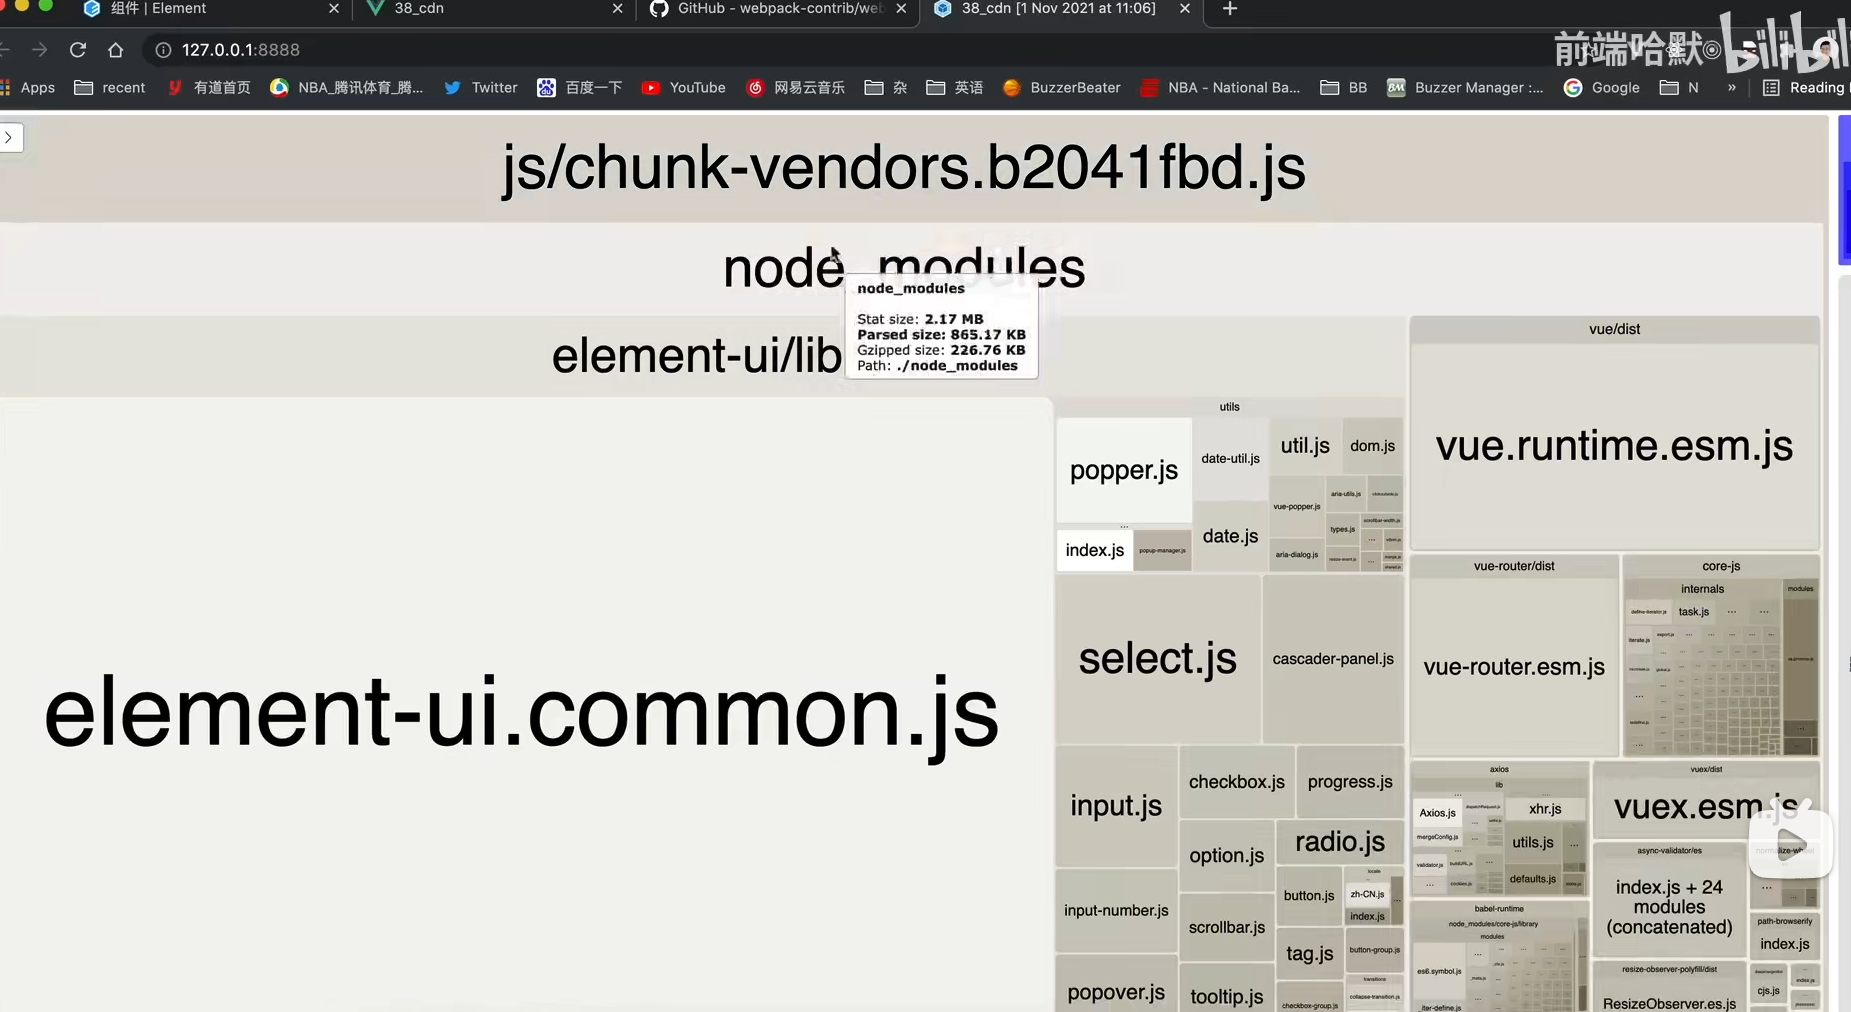
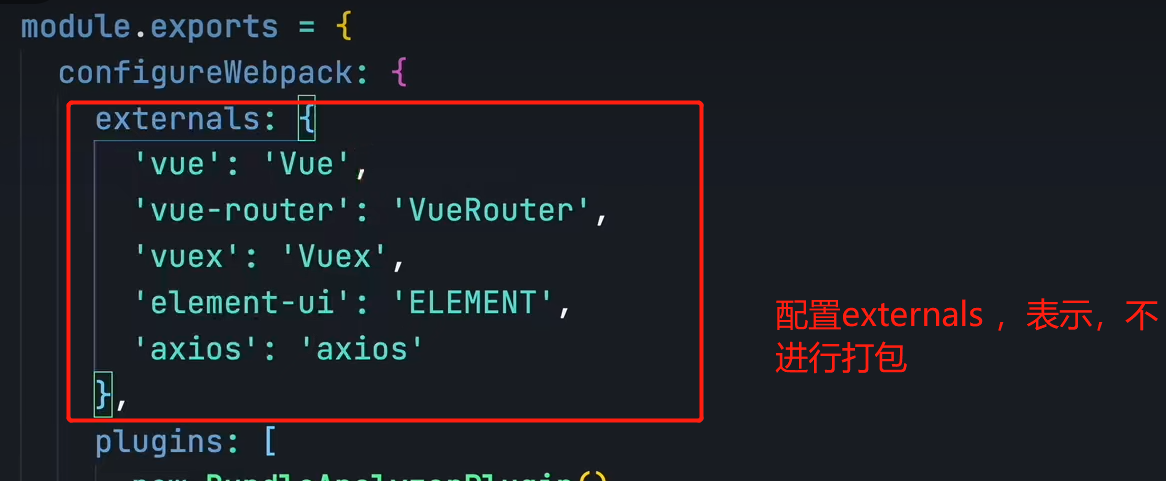
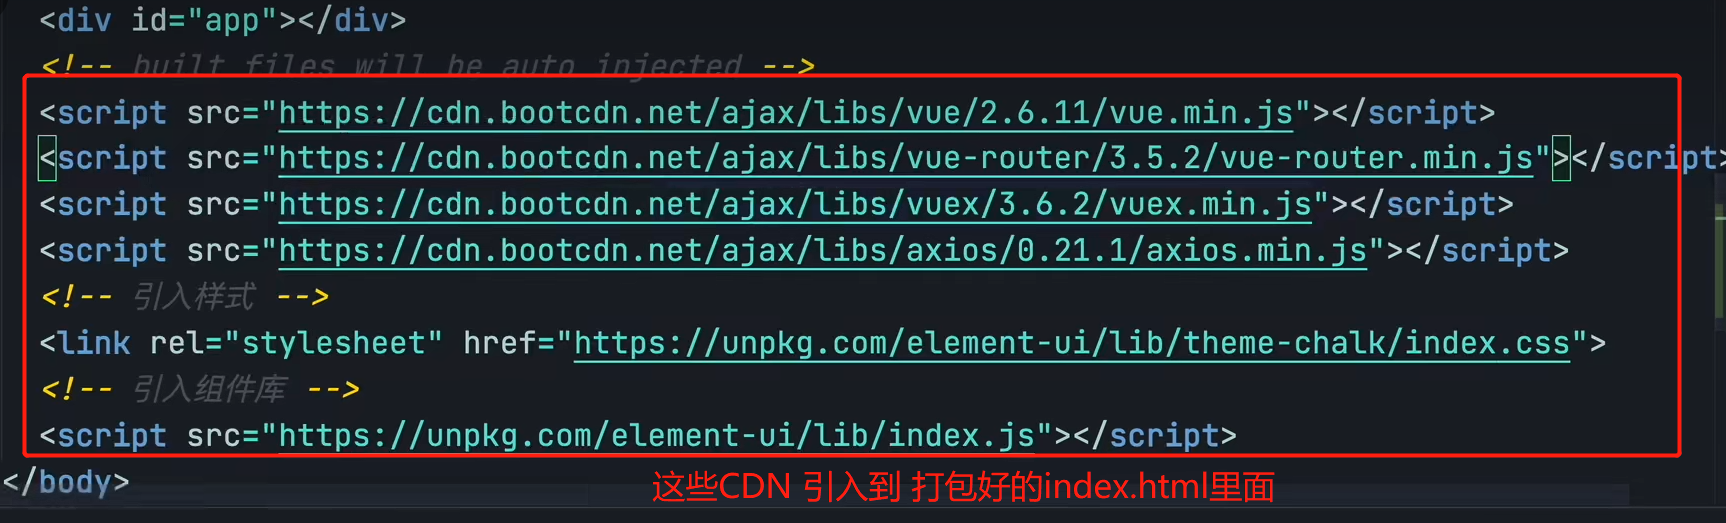
如果这些都不打包,怎么使用vue,vue-router这些呢?
答案是:通过引入CDN

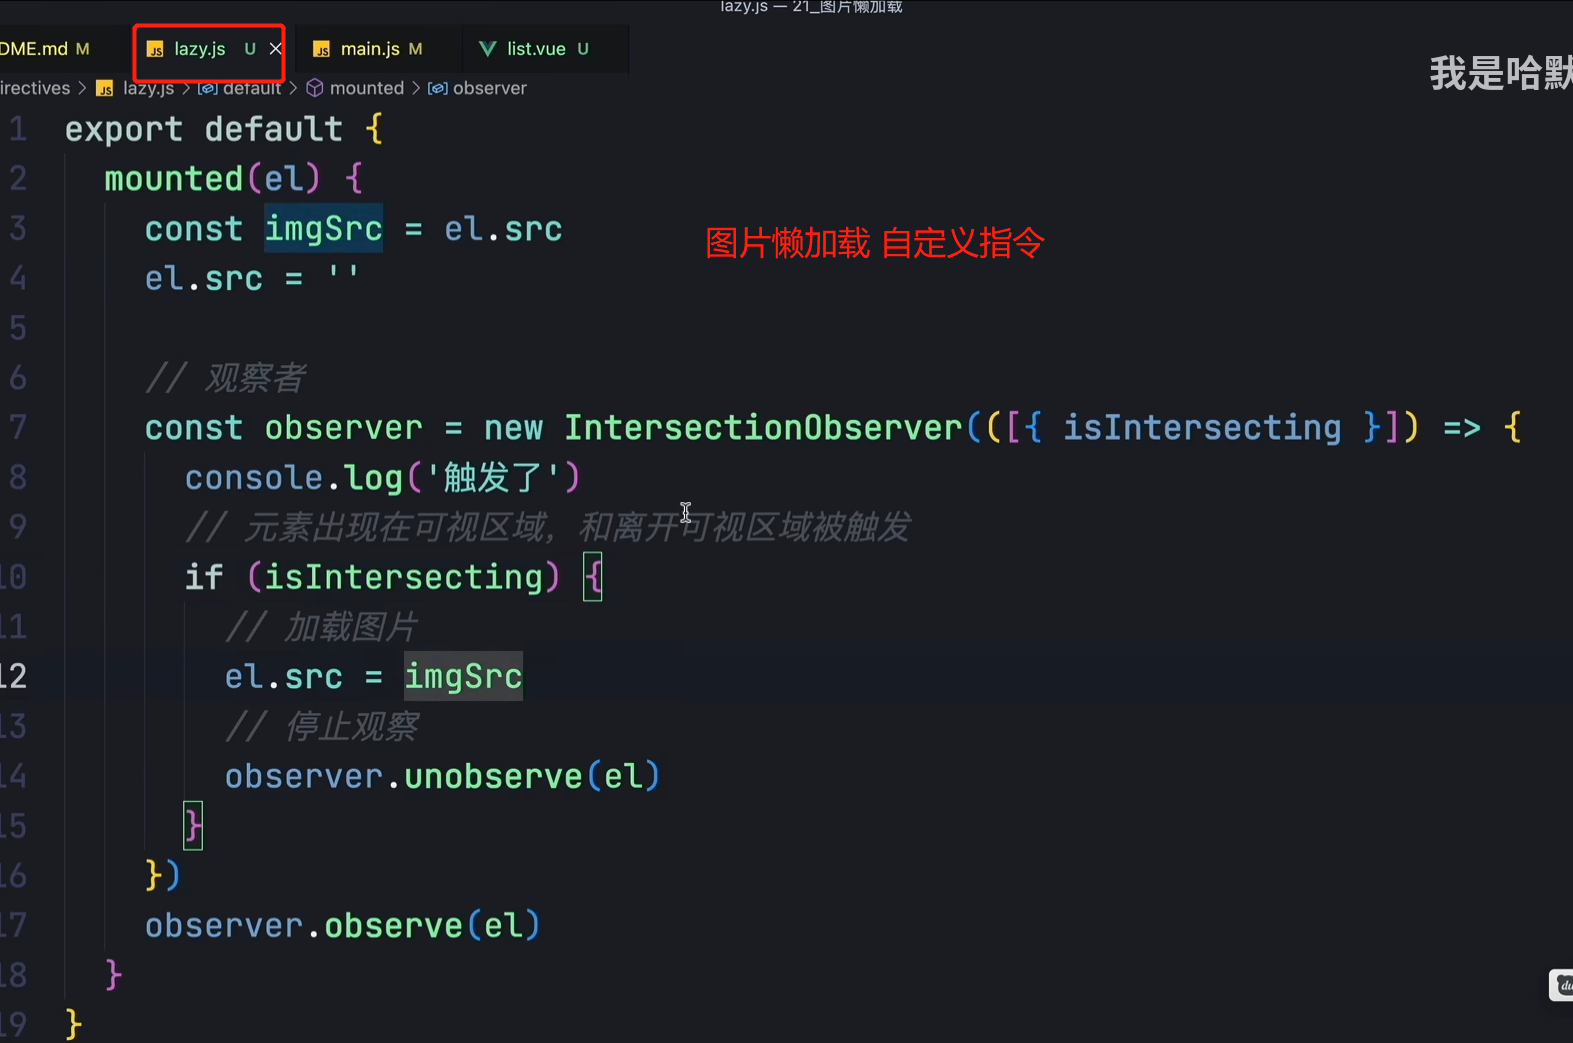
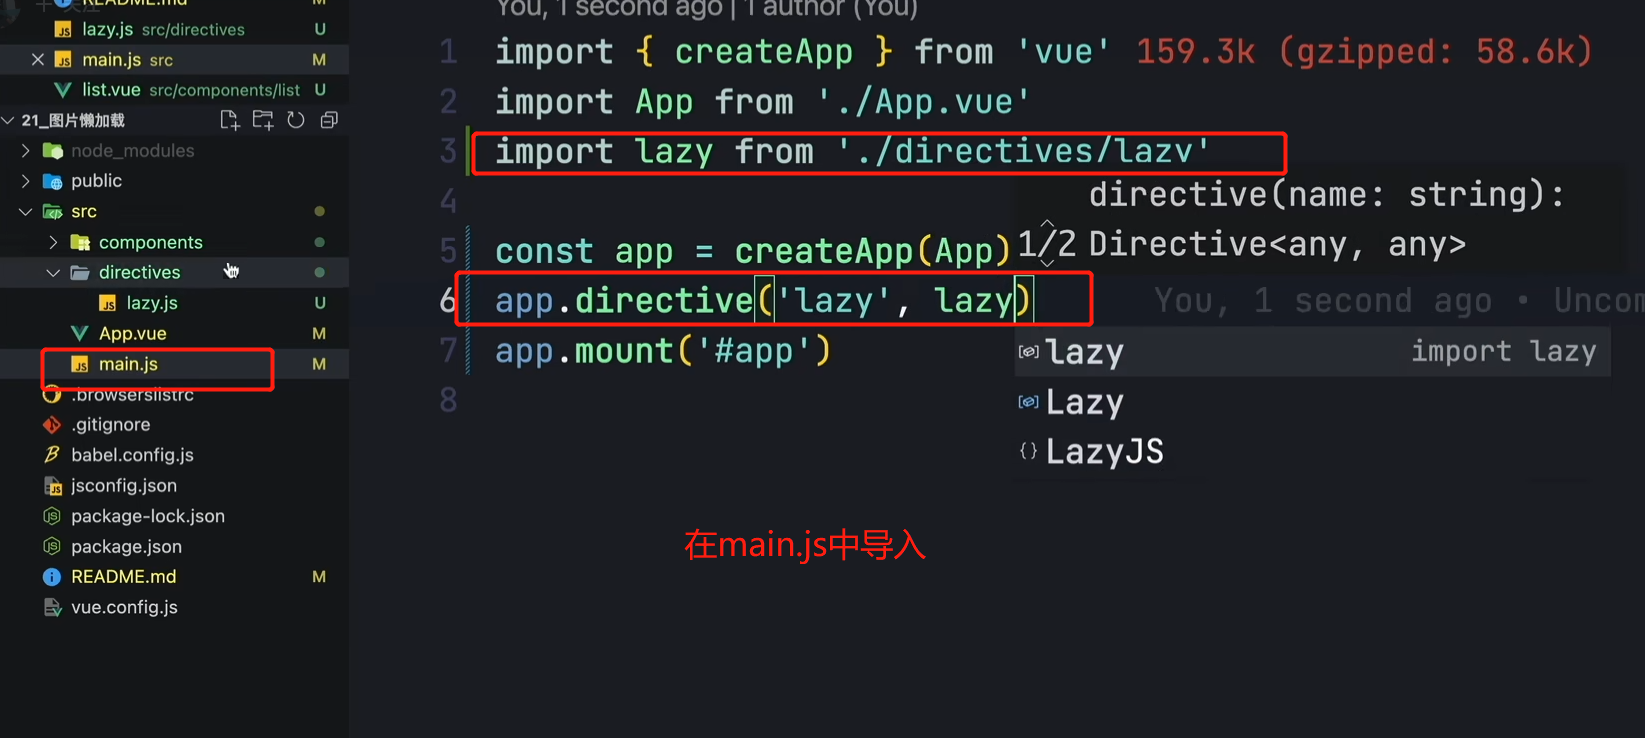
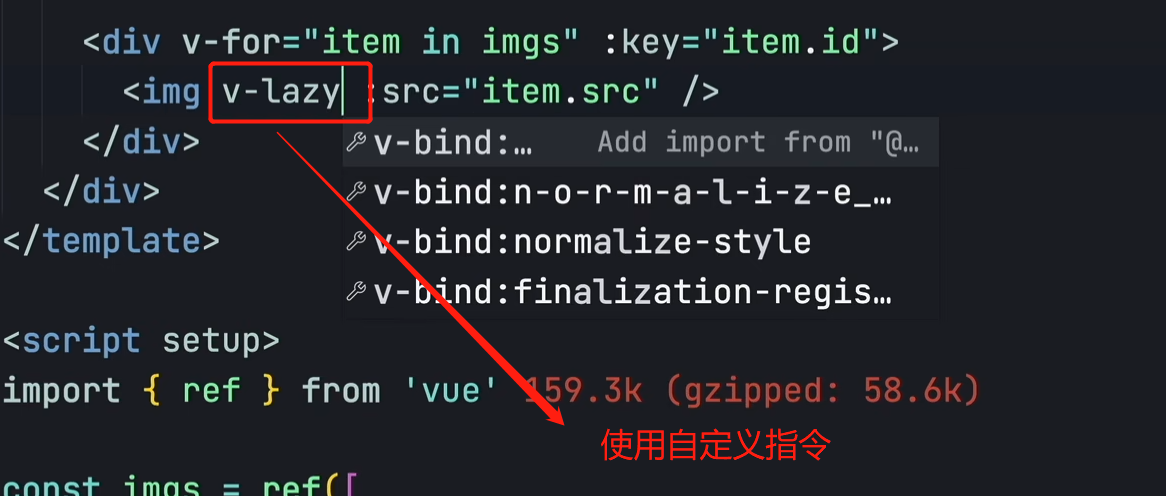
六、图片懒加载
七、Vue项目的性能优化
1、v-for 正确设置key值
2、封装复用的模块(http请求)、组件(ui库)
3、路由懒加载:component:() => import('./xxx.vue')
4、productionSourceMap: false
在设置了productionSourceMap:false 之后,就不会生成map文件,map文件的作用在于:项目打包后,代码都是经过压缩加密的,如果运行时报错,输出的错误信息无法准确得知是哪里的代码报错。如果不需要定位问题,并且不想被看到源码,就把productionSourceMap 置为false,既可以减少包大小,也可以加密源码。
5、启用gzip压缩,打包体积更小
6、keep-alive 缓存不活跃组件
7、插件CDN方式引入,减小项目体积
8、图片使用CDN地址,图片懒加载
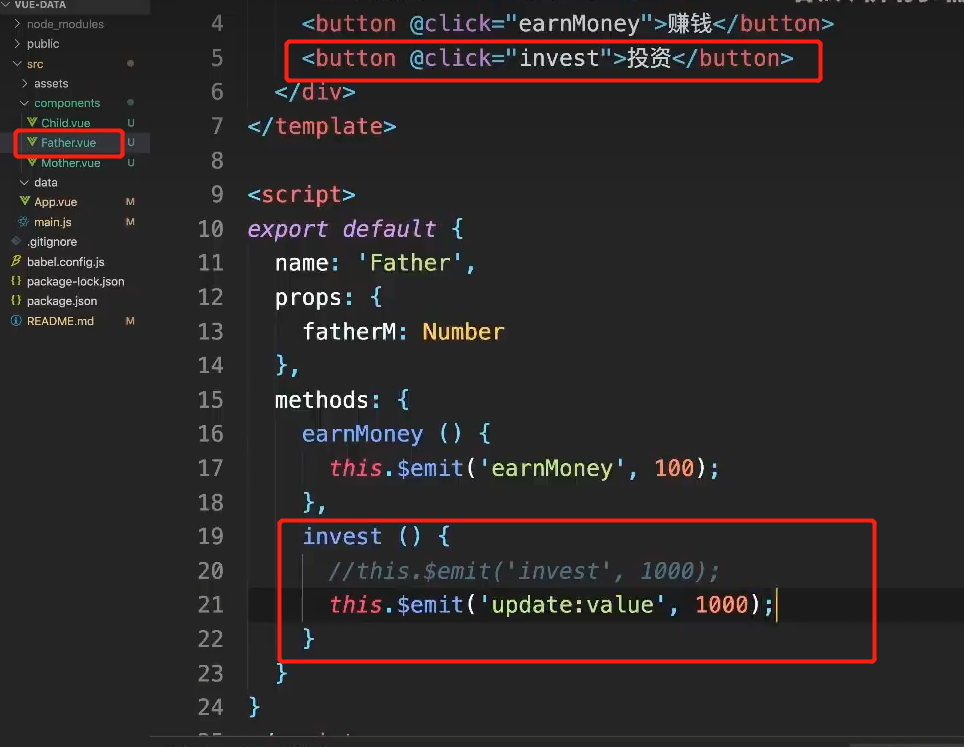
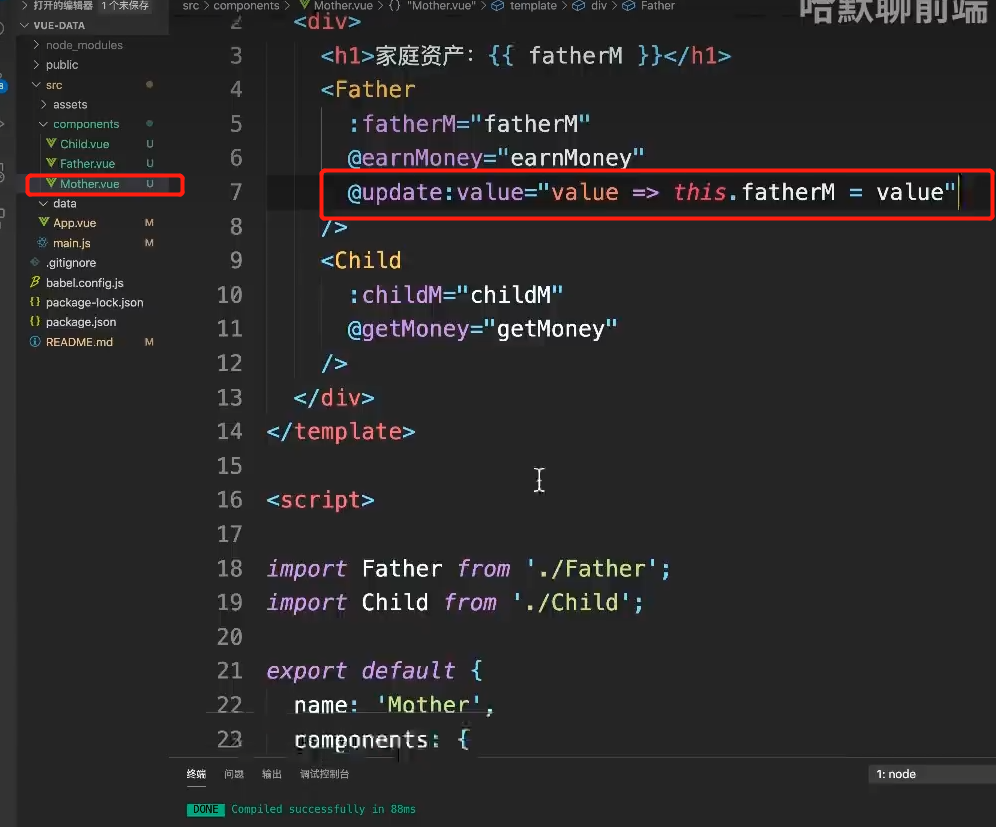
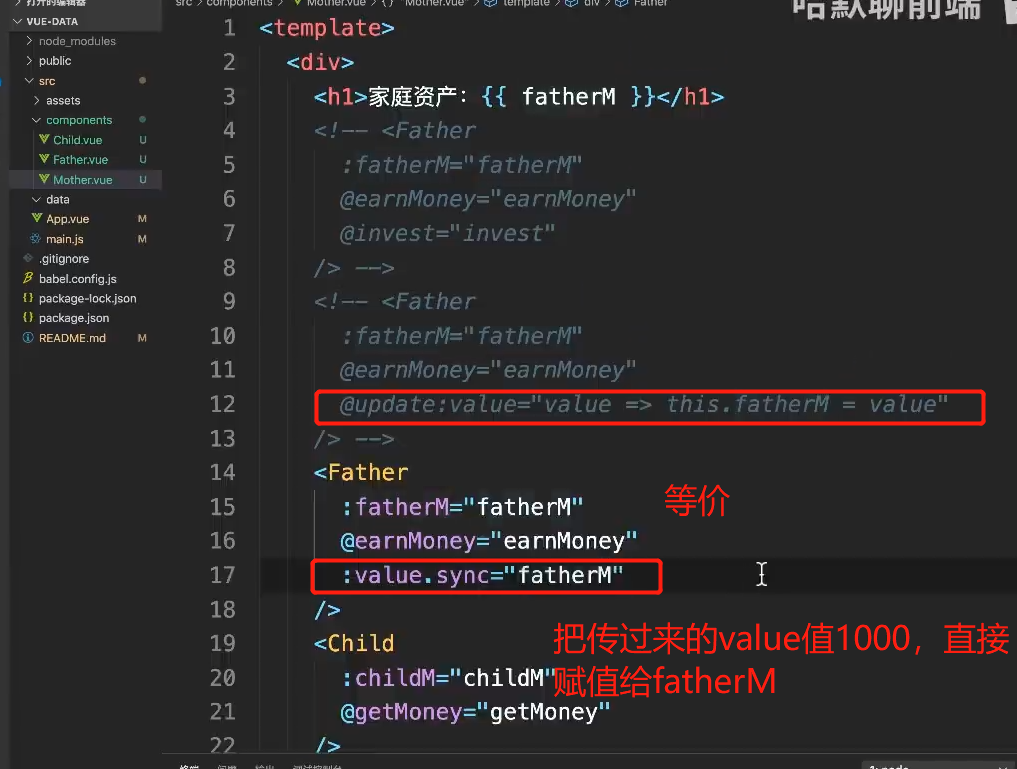
八、Vue组件数据传递
父组件:
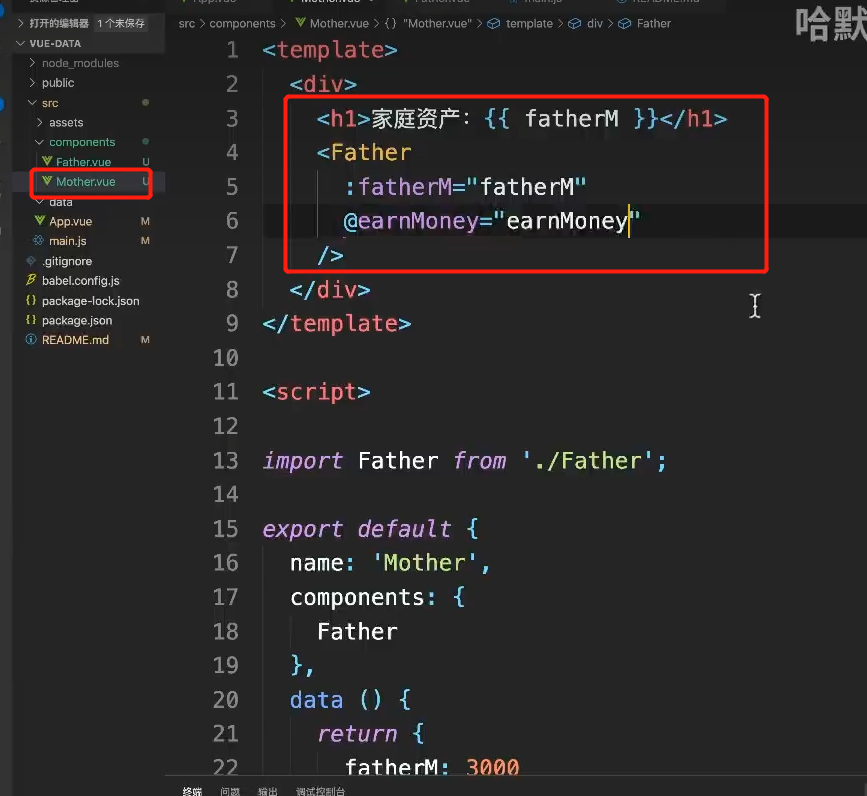
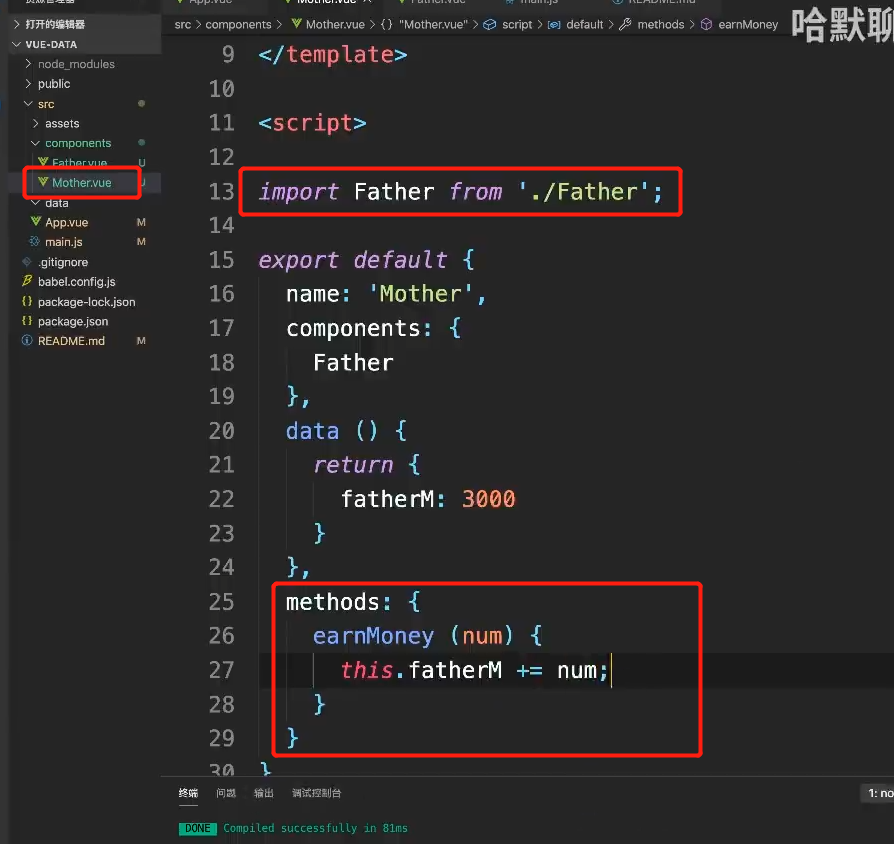
子组件使用,this.$emit(“自定义事件名称”,参数)
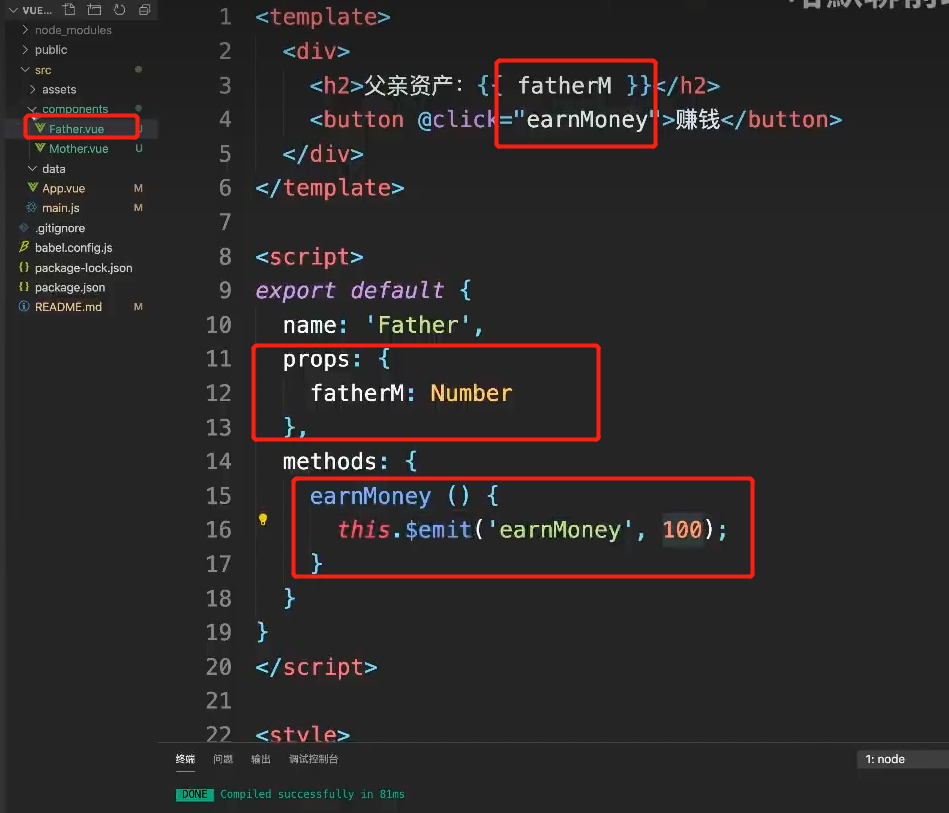
另一种写法:
九、webpack的构建流程? ?
webpack启动后,从entry开始,递归解析entry依赖的所有module,找到每module.rules里配置的loader进行相应的转换处理,对module转换后,解析模块,解析的结果是一个一个的chunk,最后webpack会将所有chunk 转换,在整个构建过程中,webpack会执行plugin当中的插件,完成plugin的任务
entry: 模块入口,使得源文件加入到构建流程中
output: 配置如何输出最终的文件
module: 配置各种类型的模块的处理规则
plugin: 配置扩展插件的
devServer:实现本地服务: 包括 http 。模块热替换。 source map等服务
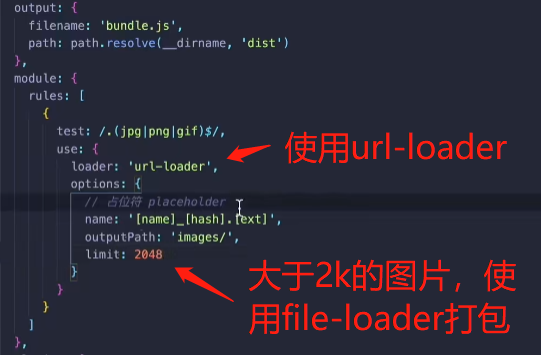
十、使用url-loader打包图片
安装url-loader
npm install url-loader -D使用配置:

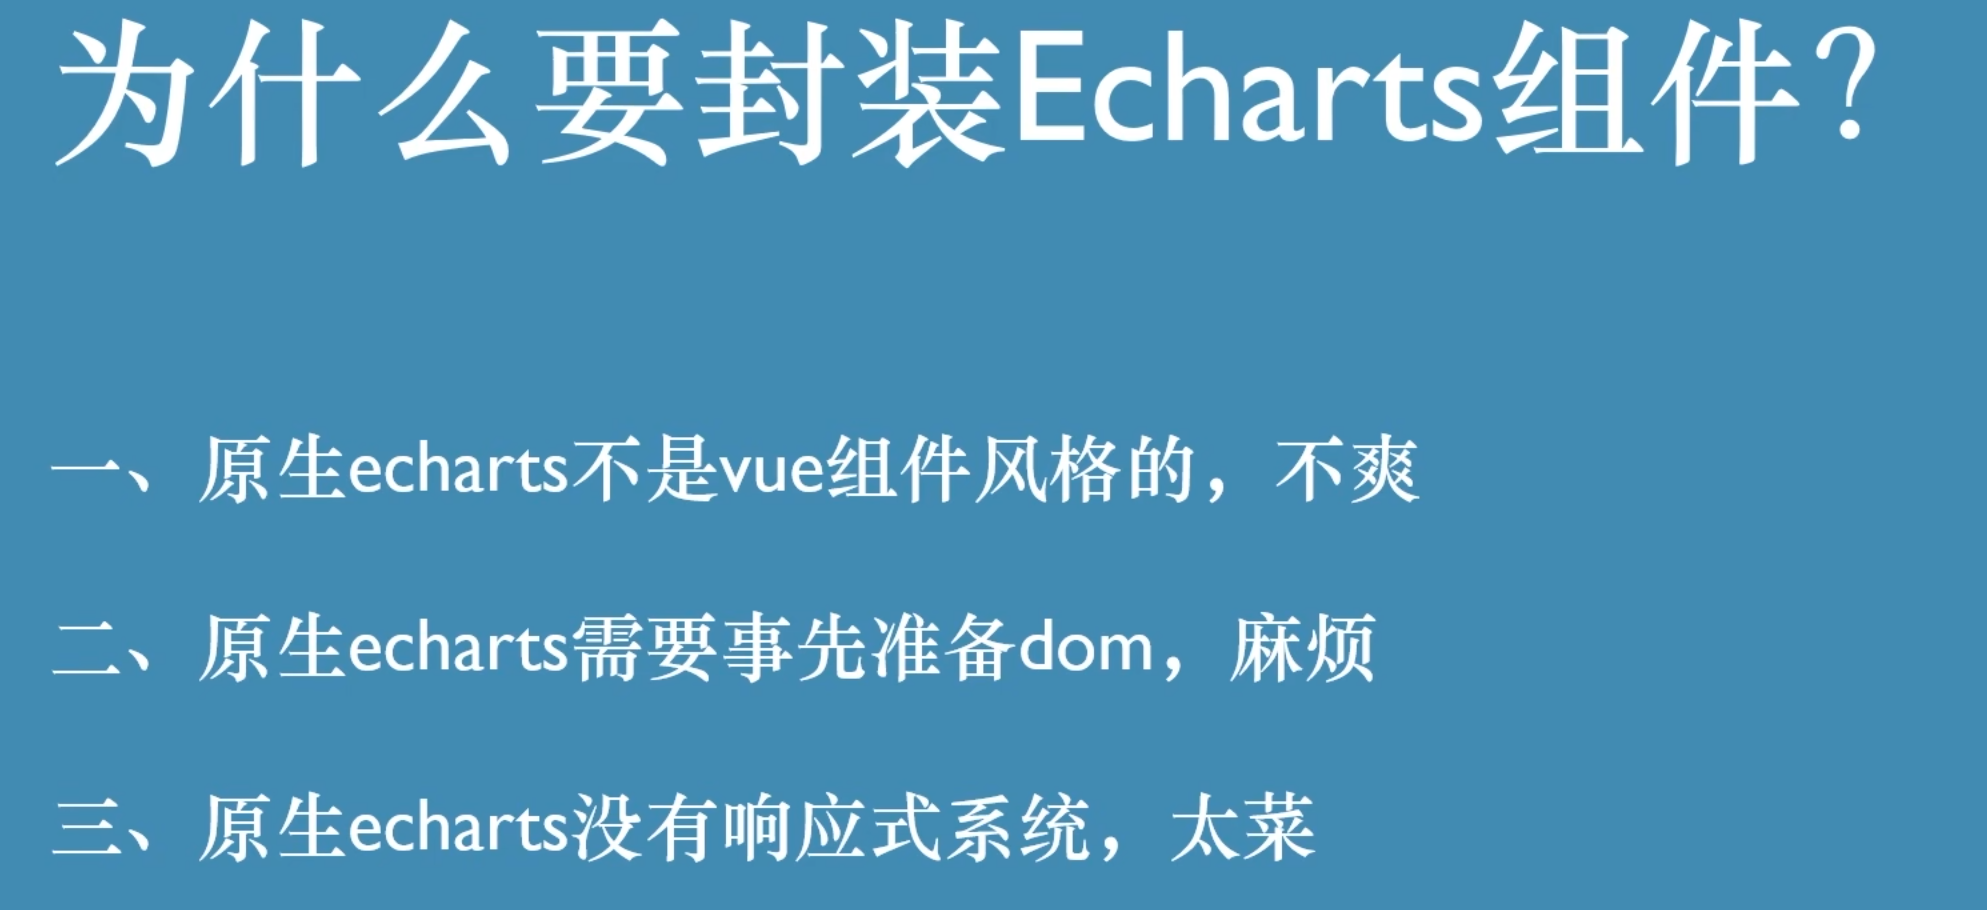
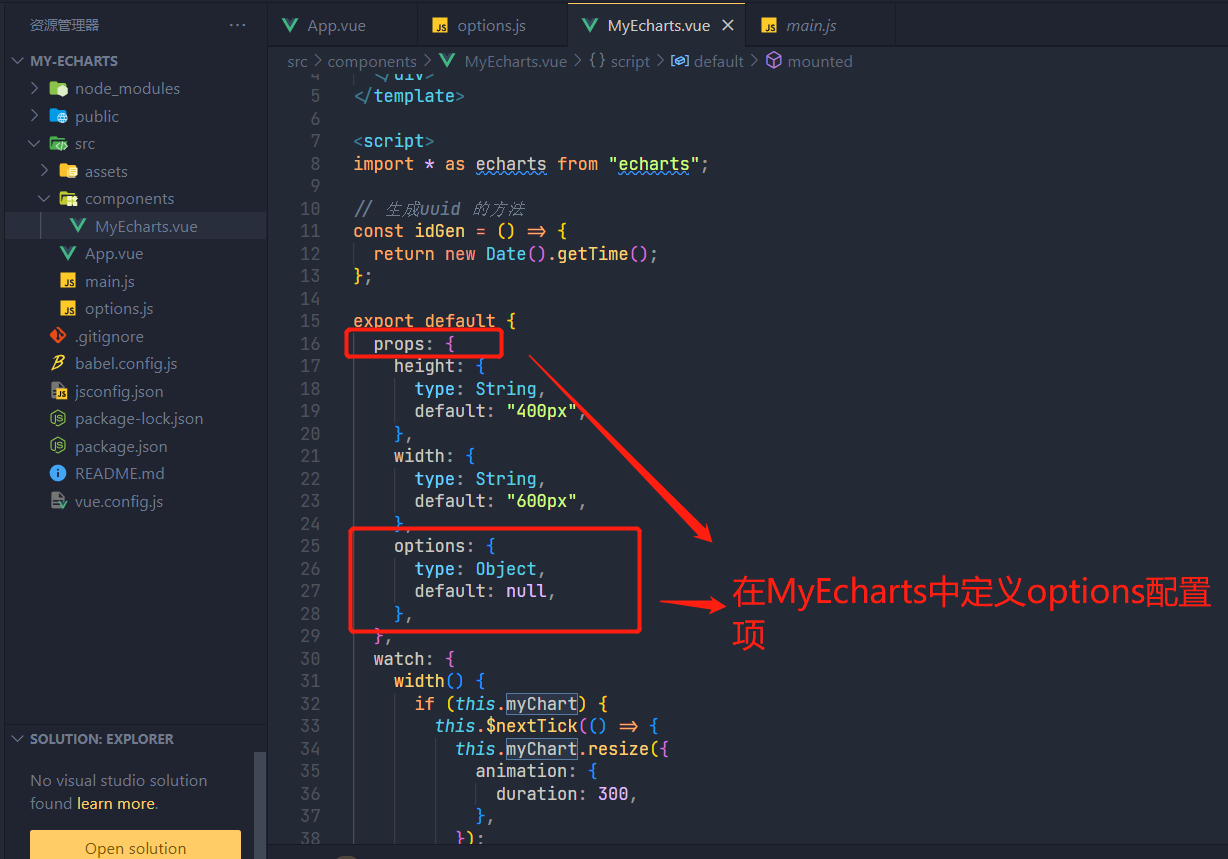
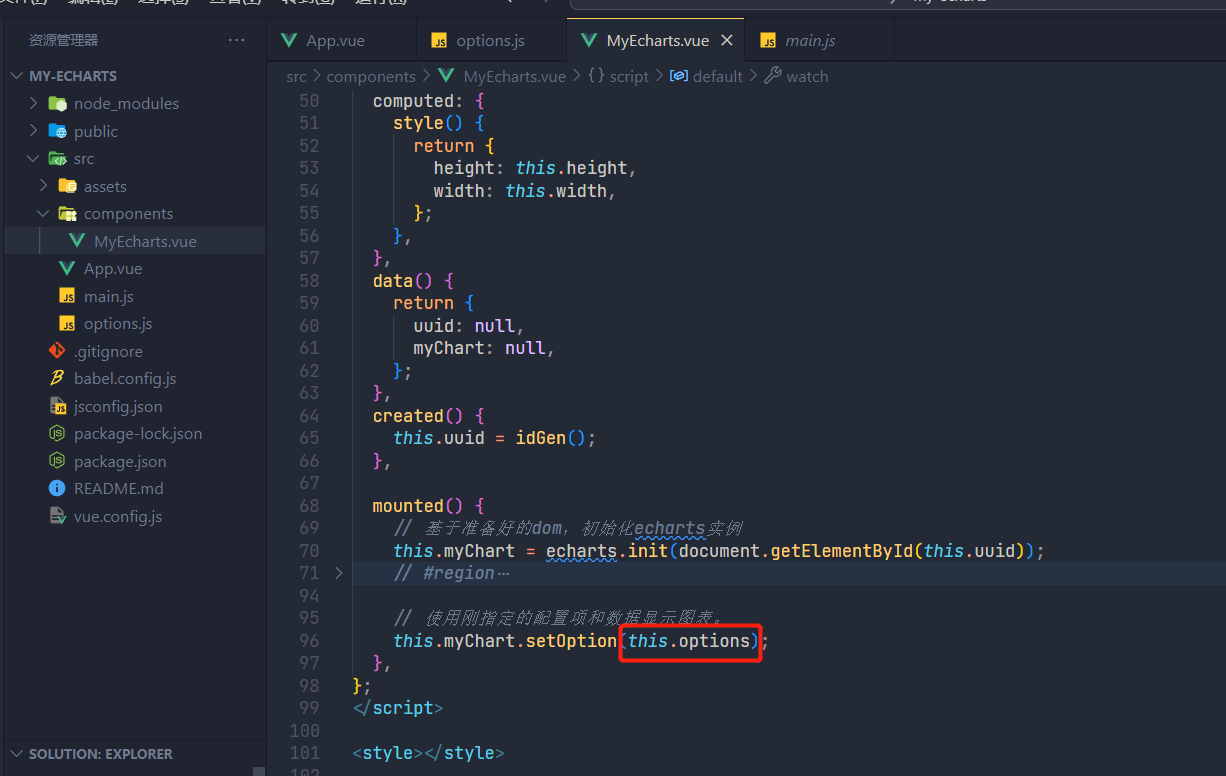
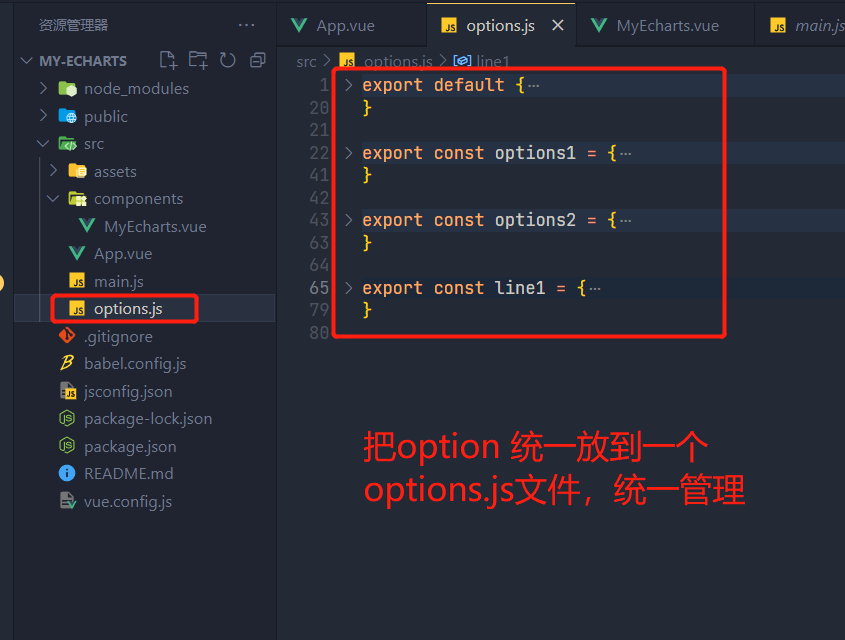
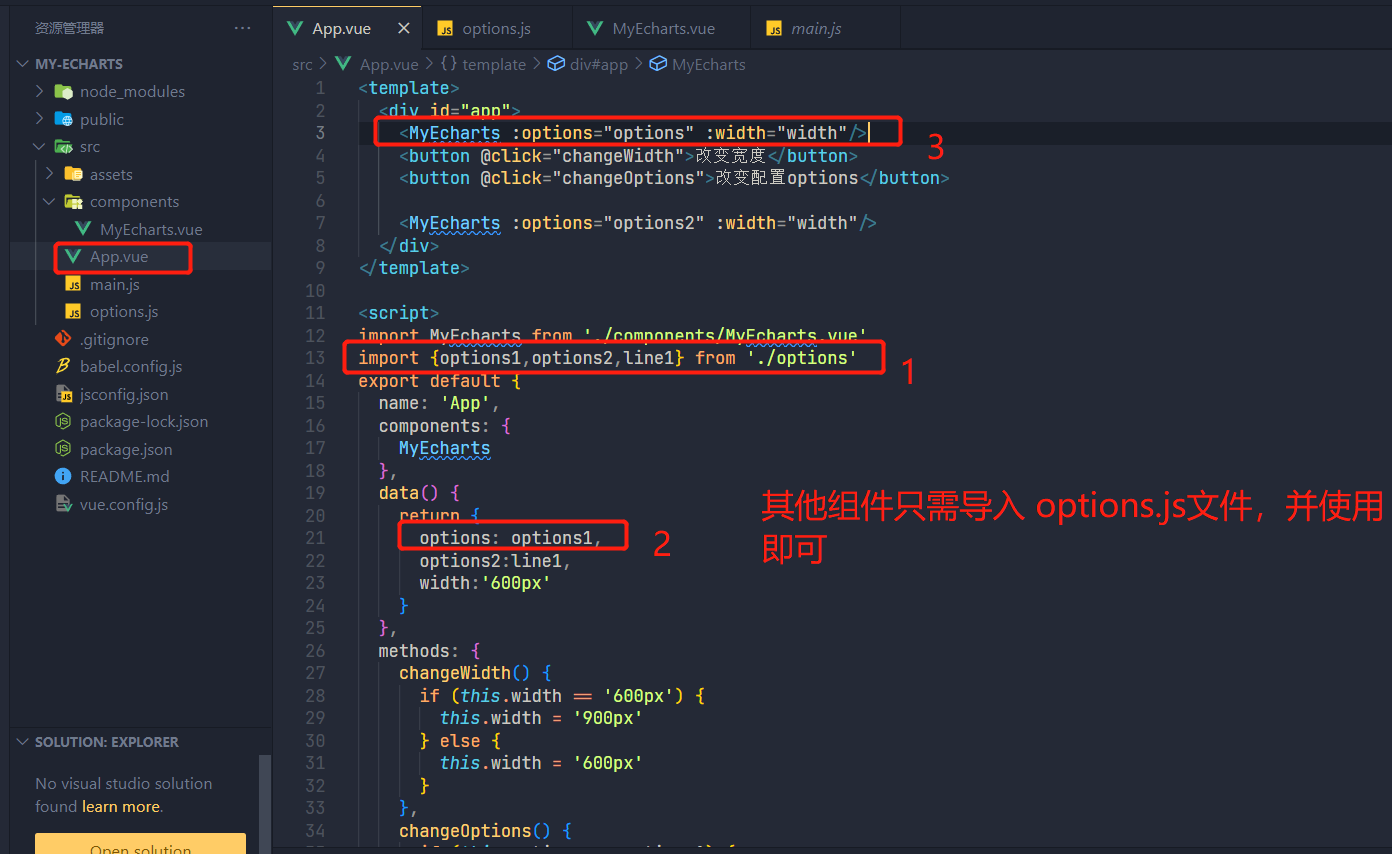
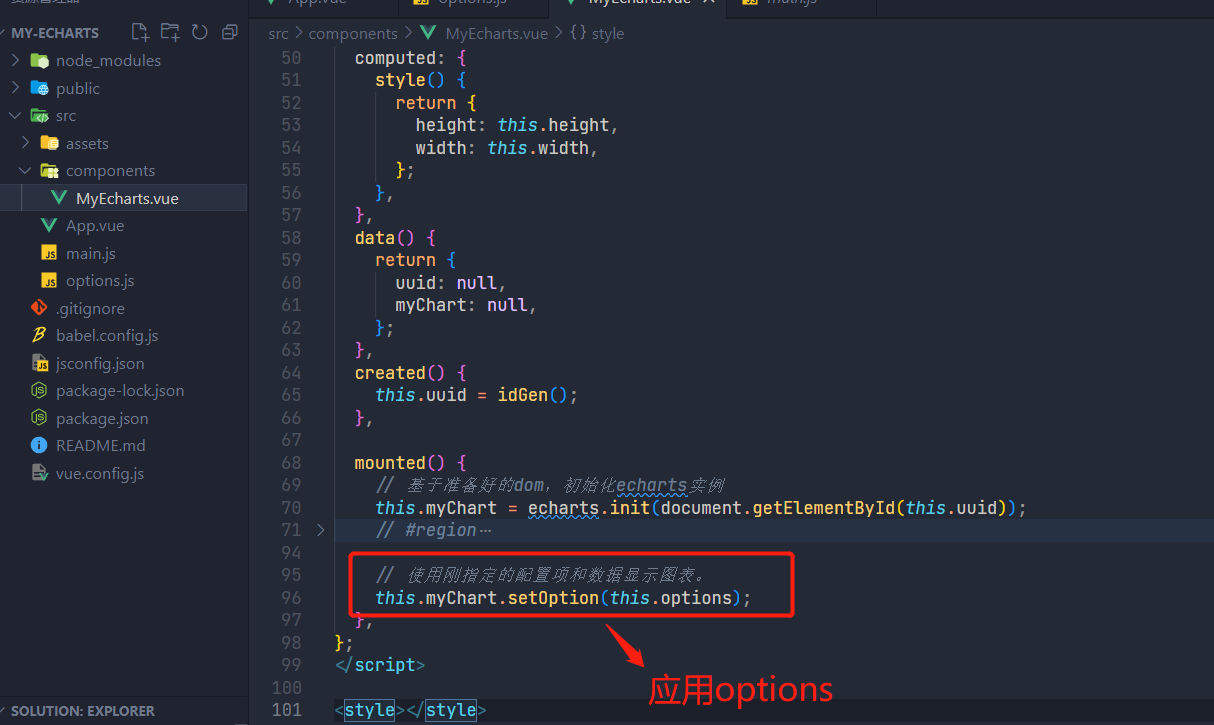
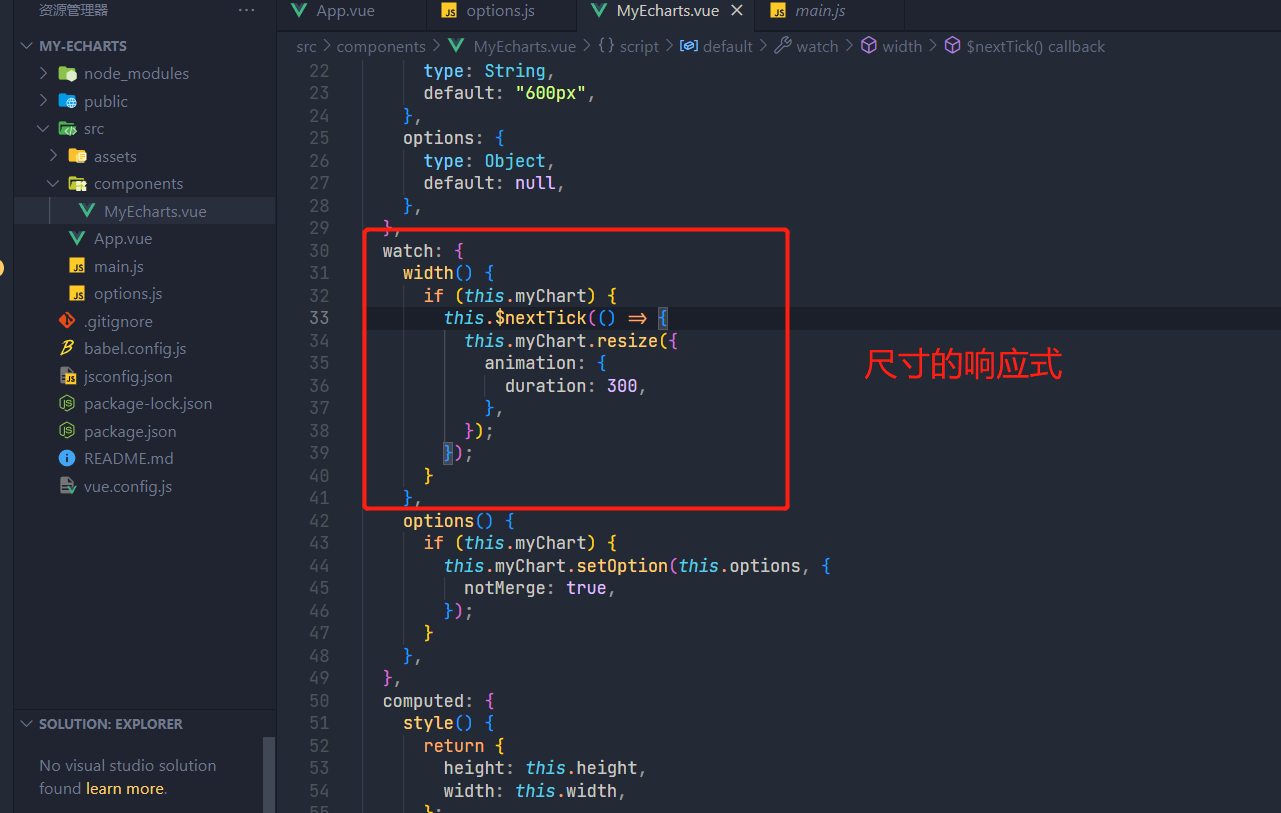
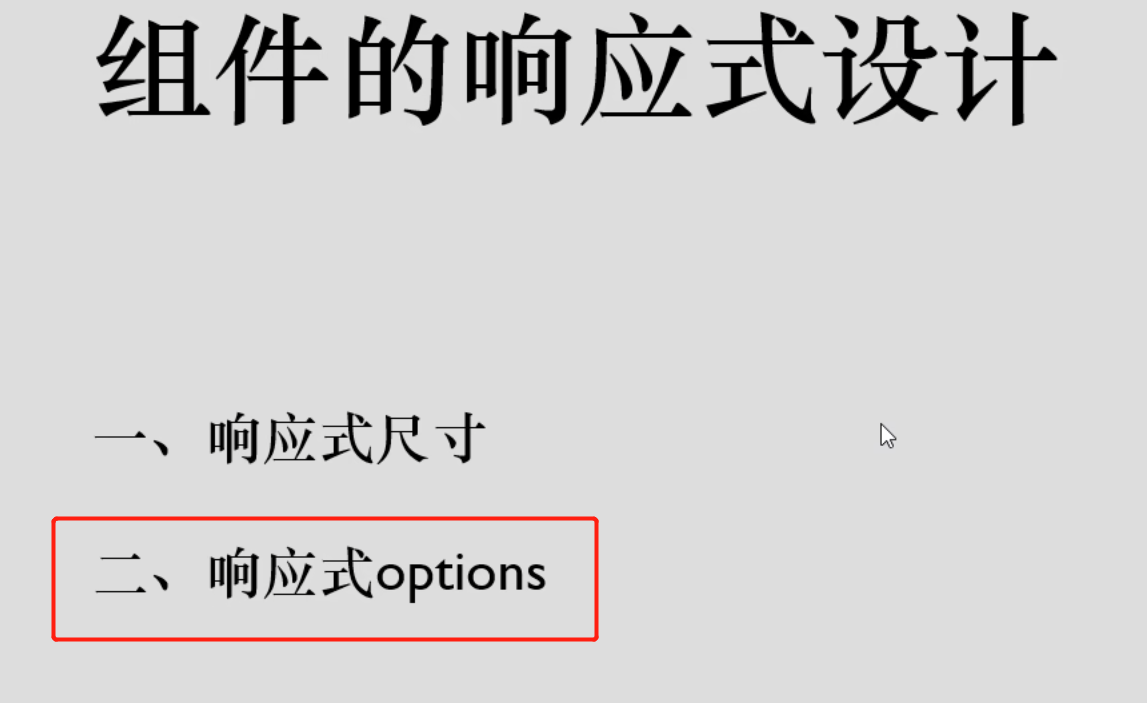
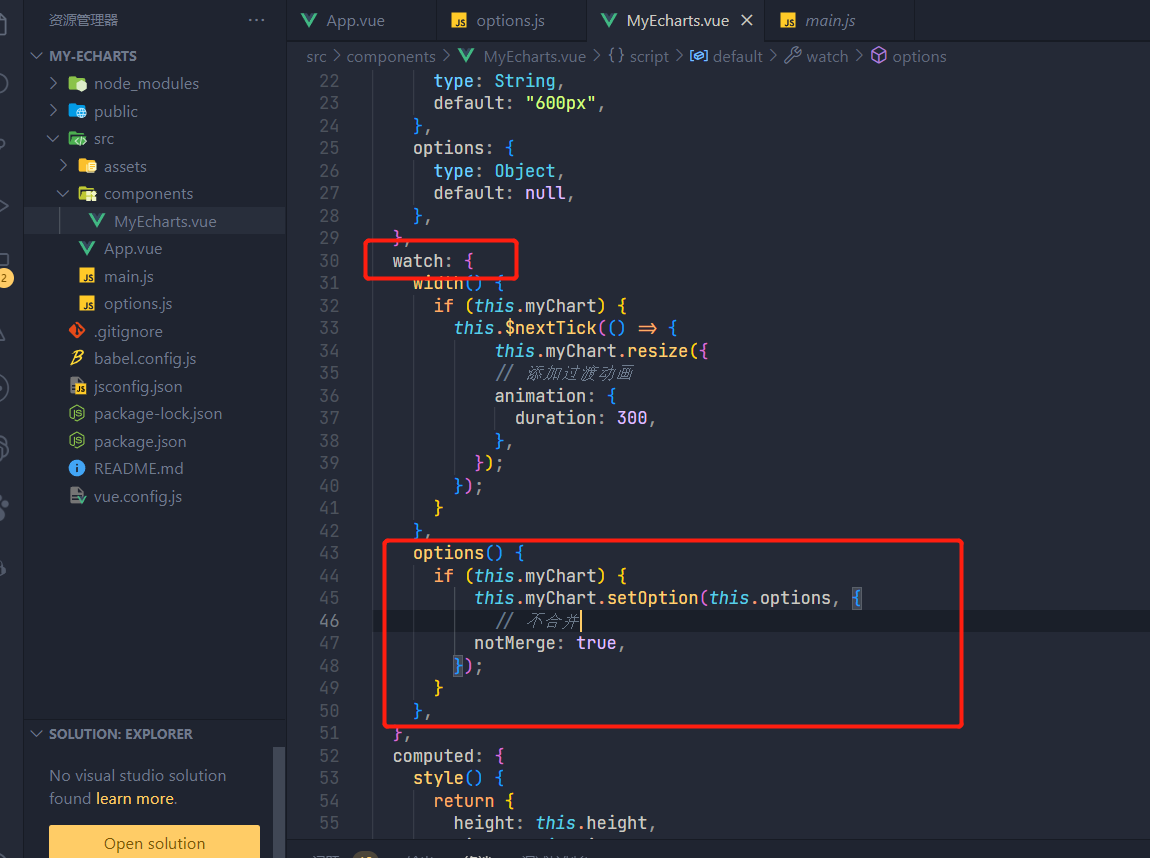
十一、Echarts 封装
<!DOCTYPE html>
<html>
  <head>
    <meta charset="utf-8" />
    <title>ECharts</title>
    <!-- 引入刚刚下载的 ECharts 文件 -->
    <script src="echarts.js"></script>
  </head>
  <body>
    <!-- 为 ECharts 准备一个定义了宽高的 DOM -->
    <div id="main" style="width: 600px;height:400px;"></div>
    <script type="text/javascript">
      // 基于准备好的dom,初始化echarts实例
      var myChart = echarts.init(document.getElementById('main'));

      // 指定图表的配置项和数据
      var option = {
        title: {
          text: 'ECharts 入门示例'
        },
        tooltip: {},
        legend: {
          data: ['销量']
        },
        xAxis: {
          data: ['衬衫', '羊毛衫', '雪纺衫', '裤子', '高跟鞋', '袜子']
        },
        yAxis: {},
        series: [
          {
            name: '销量',
            type: 'bar',
            data: [5, 20, 36, 10, 10, 20]
          }
        ]
      };

      // 使用刚指定的配置项和数据显示图表。
      myChart.setOption(option);
    </script>
  </body>
</html>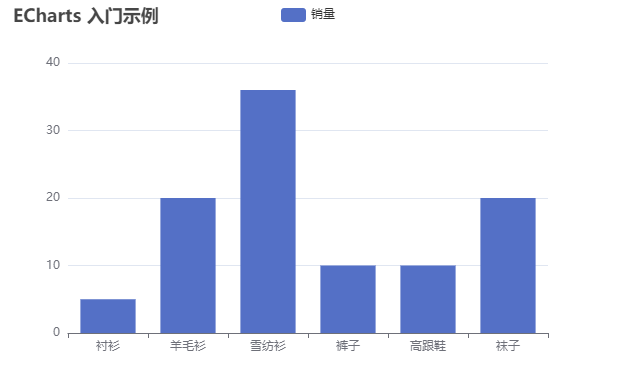

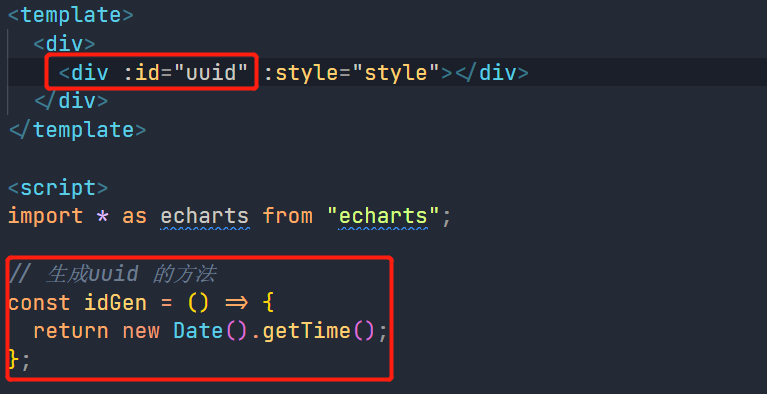
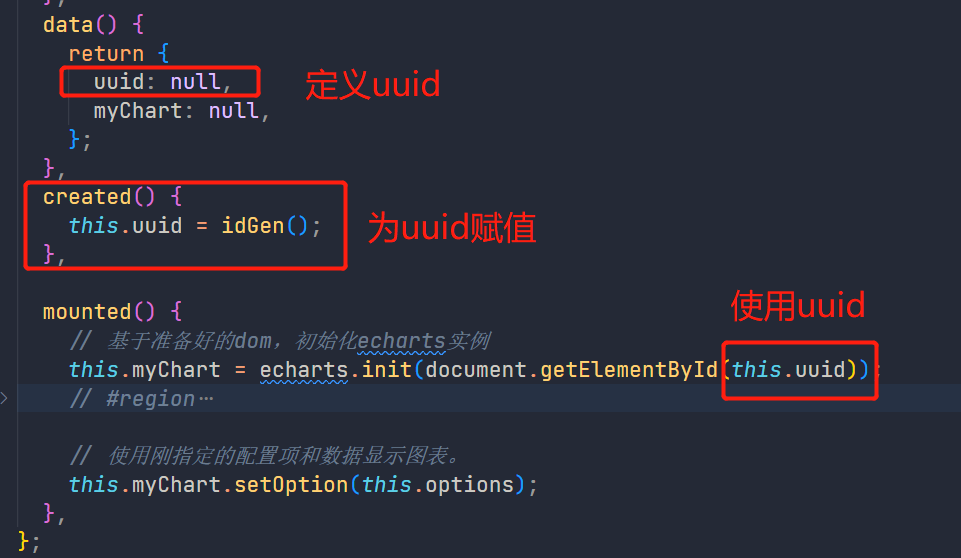
自定义 style
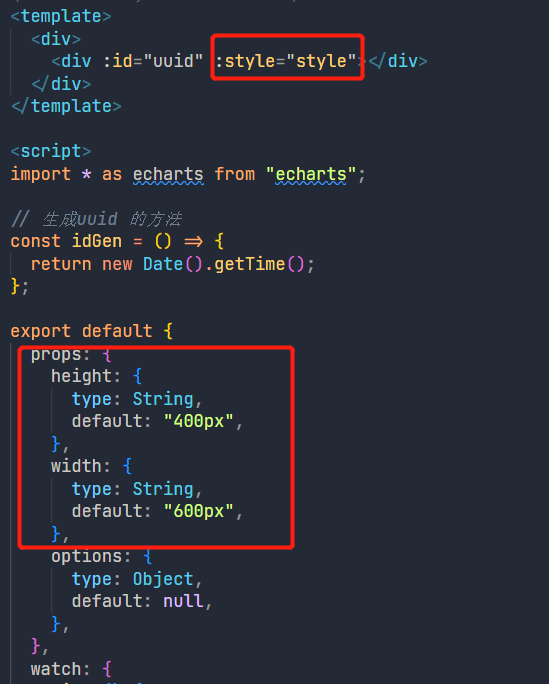
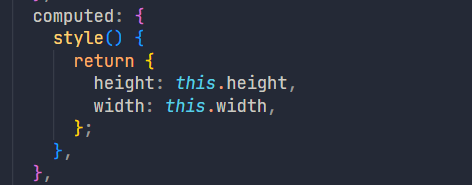
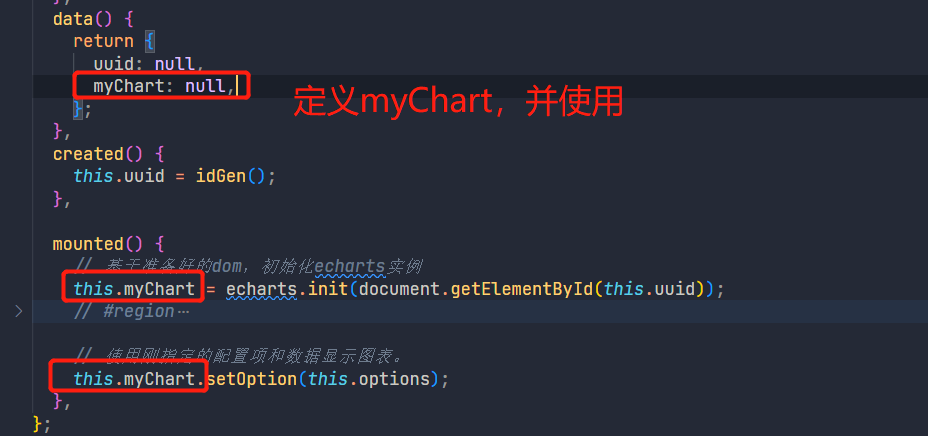
将 myChart 交给 data() 管理,而不是 var myCharts =。。。。。
十二、搭建组件库

yarn start 启动项目
十三、File